Use Cases
This page documents how ads are created, reviewed, and managed in the Jod platform. It is written for non-technical team members — no coding knowledge needed.
In the current deployment, ads run without billing integration. Companies can create and submit campaigns freely. Billing (placement credits) will be enforced in a later release.
| # | Use Case | Who | How it starts |
|---|---|---|---|
| UC1 | Creates a Campaign | Company or Admin | Clicks "Create Campaign" in employer dashboard or Team Portal |
| UC2 | Submits Campaign for Review | Company or Admin | Clicks "Submit for Review" on a draft campaign |
| UC3 | Admin Approves a Campaign | Admin | Clicks "Approve" on a pending_review campaign |
| UC4 | Admin Rejects a Campaign | Admin | Clicks "Reject" with a note explaining the issue |
| UC5 | Company Revises and Resubmits | Company | Edits campaign after rejection and resubmits |
| UC6 | Campaign Goes Live | System | Automatic — runs daily when scheduled start date is reached |
| UC7 | Marketplace Serves an Ad | Public visitor | Visits any page with an active ad slot |
| UC8 | Daily Credit Consumption | System | Automatic daily billing job (billing integration TBD) |
| UC9 | User Views an Ad | User (browser) | Ad scrolls into viewport |
| UC10 | User Clicks an Ad | User | Clicks the ad image or CTA |
| UC11 | Campaign Cancelled | Company or Admin | Clicks "Cancel Campaign" on an approved campaign |
| UC12 | Company Views Campaign Analytics | Company | Opens campaign detail page |
| UC13 | Company Reuses a Creative | Company | Selects existing creative when adding a placement |
| UC14 | Campaign Completes | System | Automatic — runs daily when end date is reached |
| UC15 | Admin Manages Placement Inventory | Admin | Navigates to Team Portal → Ads → Placements |
UC1 — Creates a Campaign
A campaign is the top-level container for your advertising. Inside a campaign, you add one or more placements — each placement is a specific ad slot (e.g. Home Hero Banner) with a creative image and duration.
Step 1 — Open the Campaigns Page
Navigate to Employer Dashboard → Ads → Campaigns. You will see your existing campaigns here.
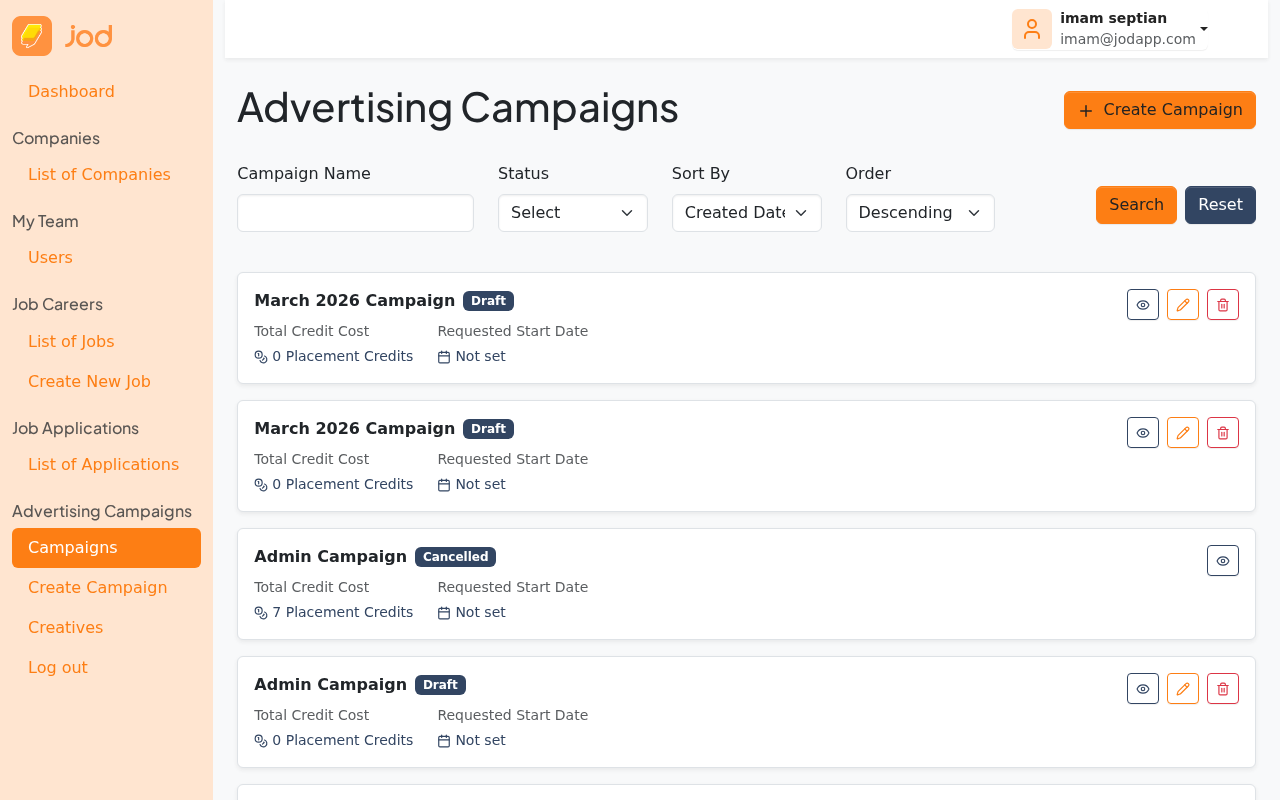
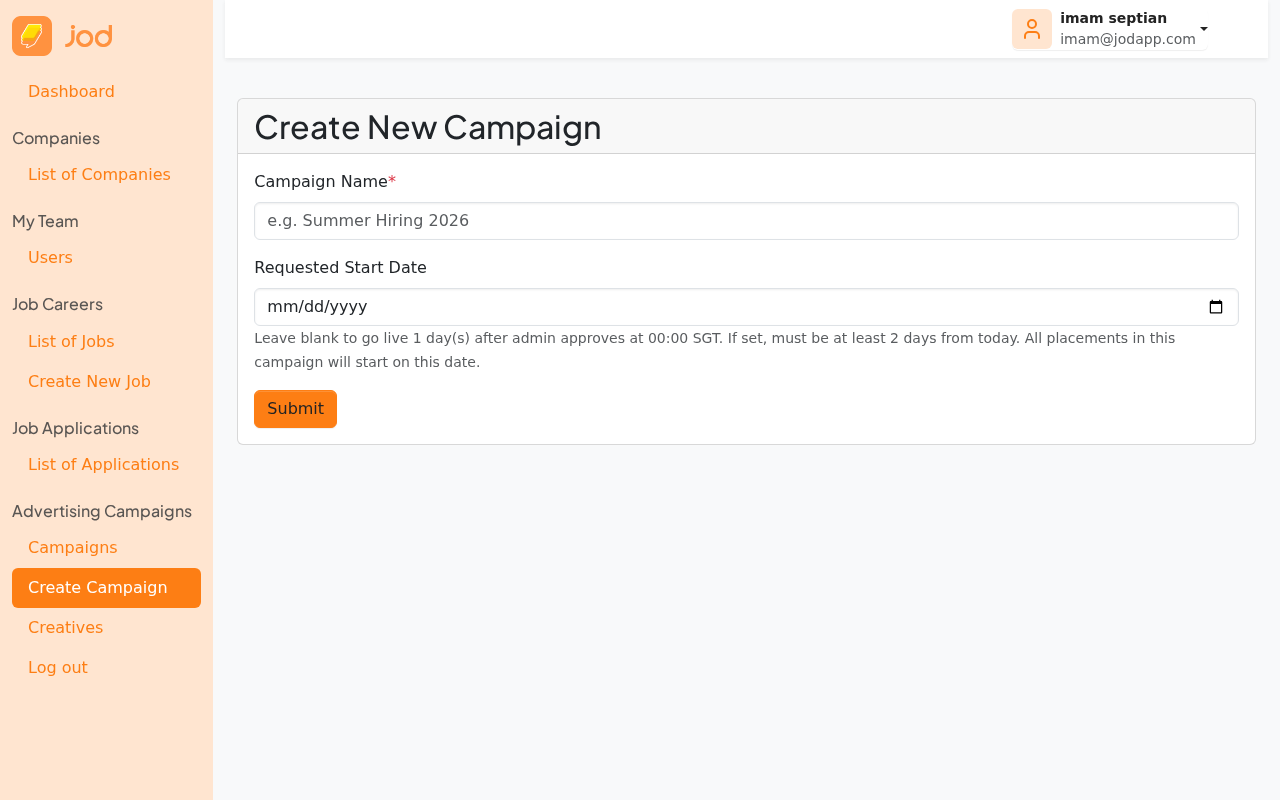
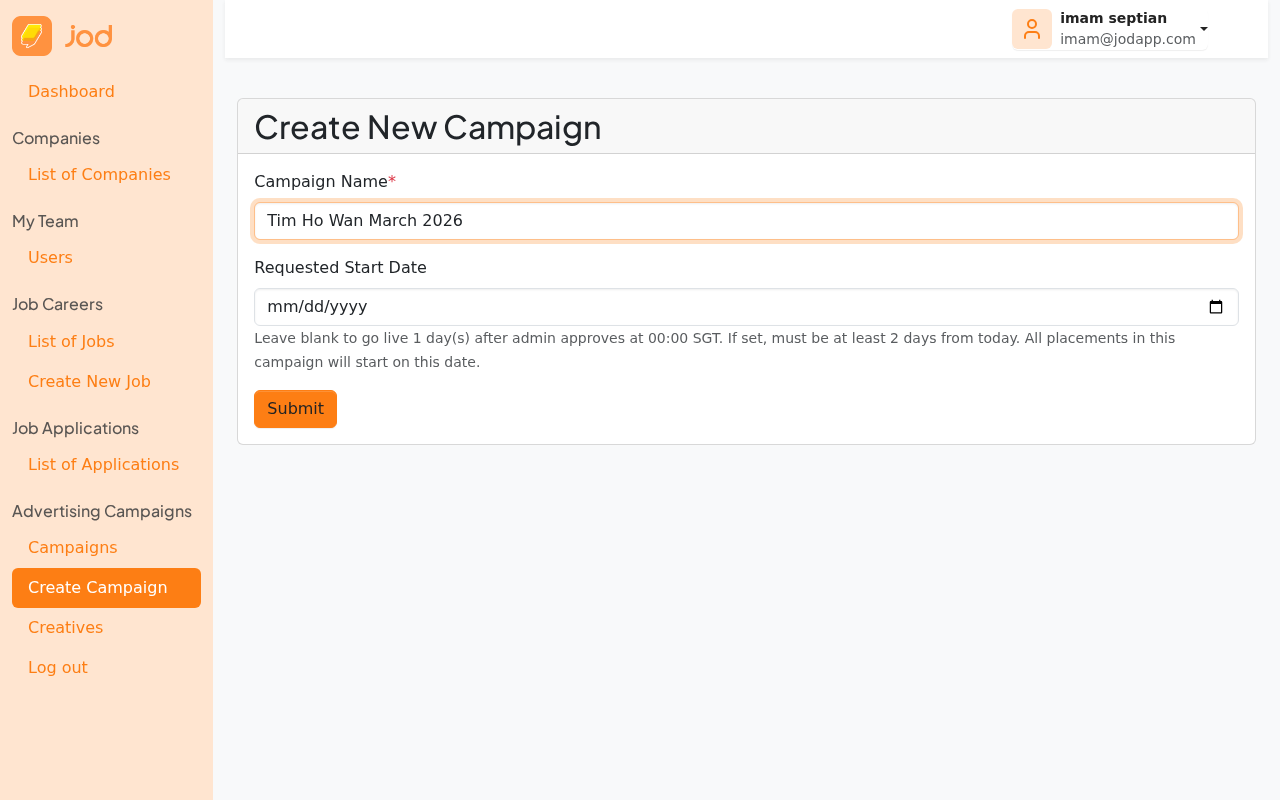
Step 2 — Create a New Campaign
Click "New Campaign" (or the equivalent button). Enter a campaign name. The start date is optional — if left blank, all placements will go live 1 day after admin approval.
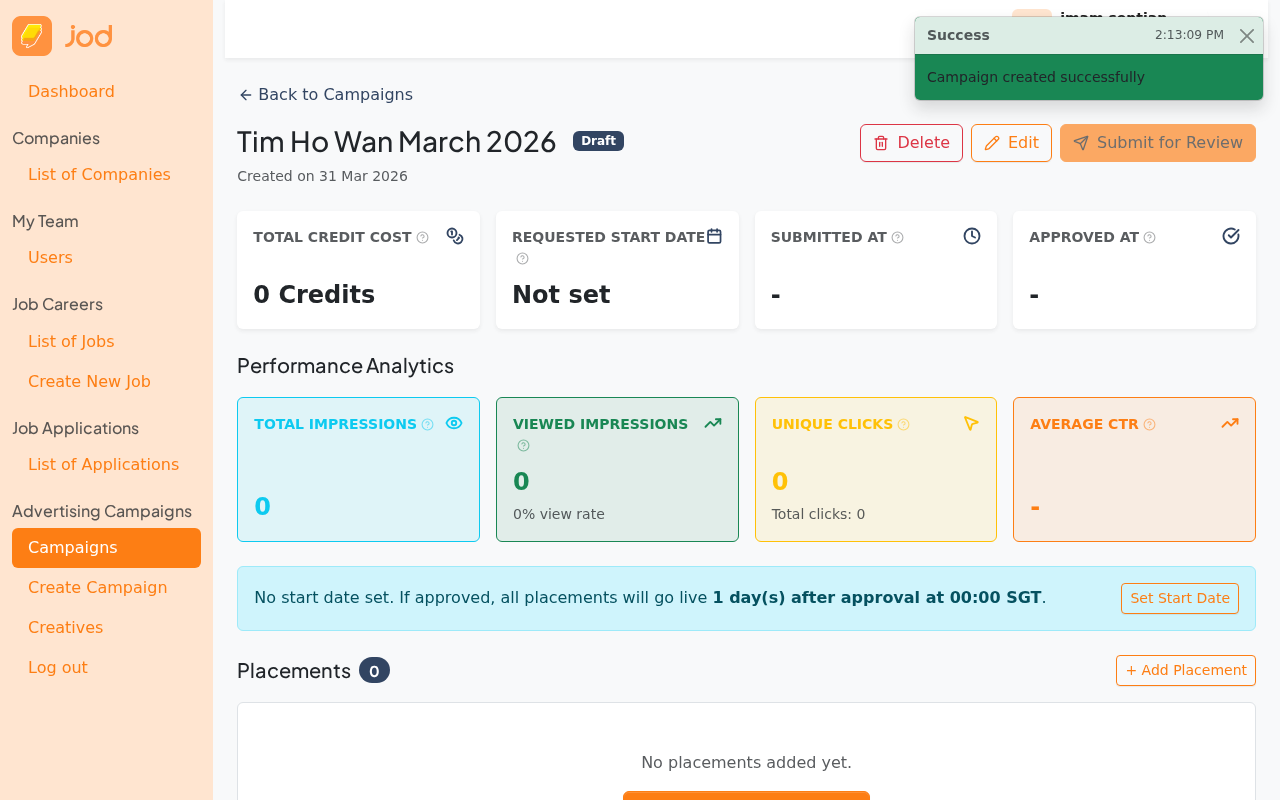
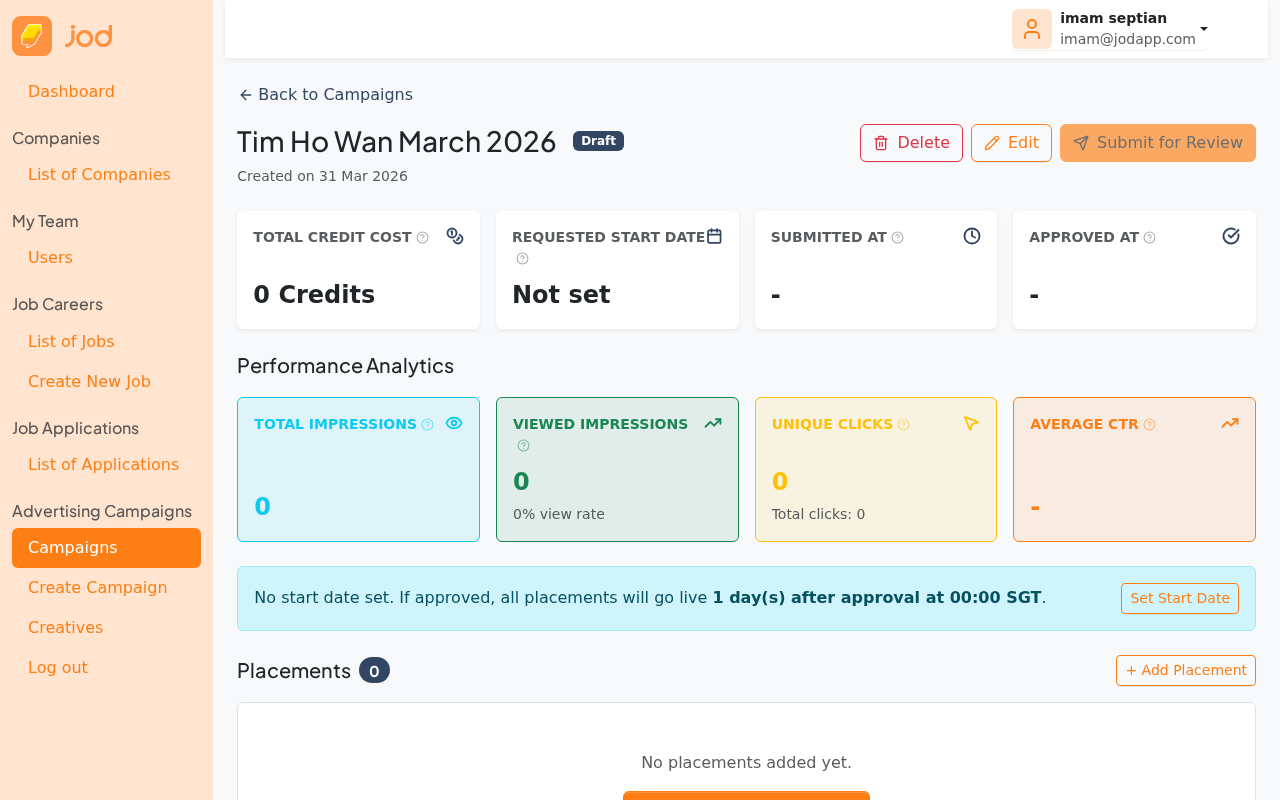
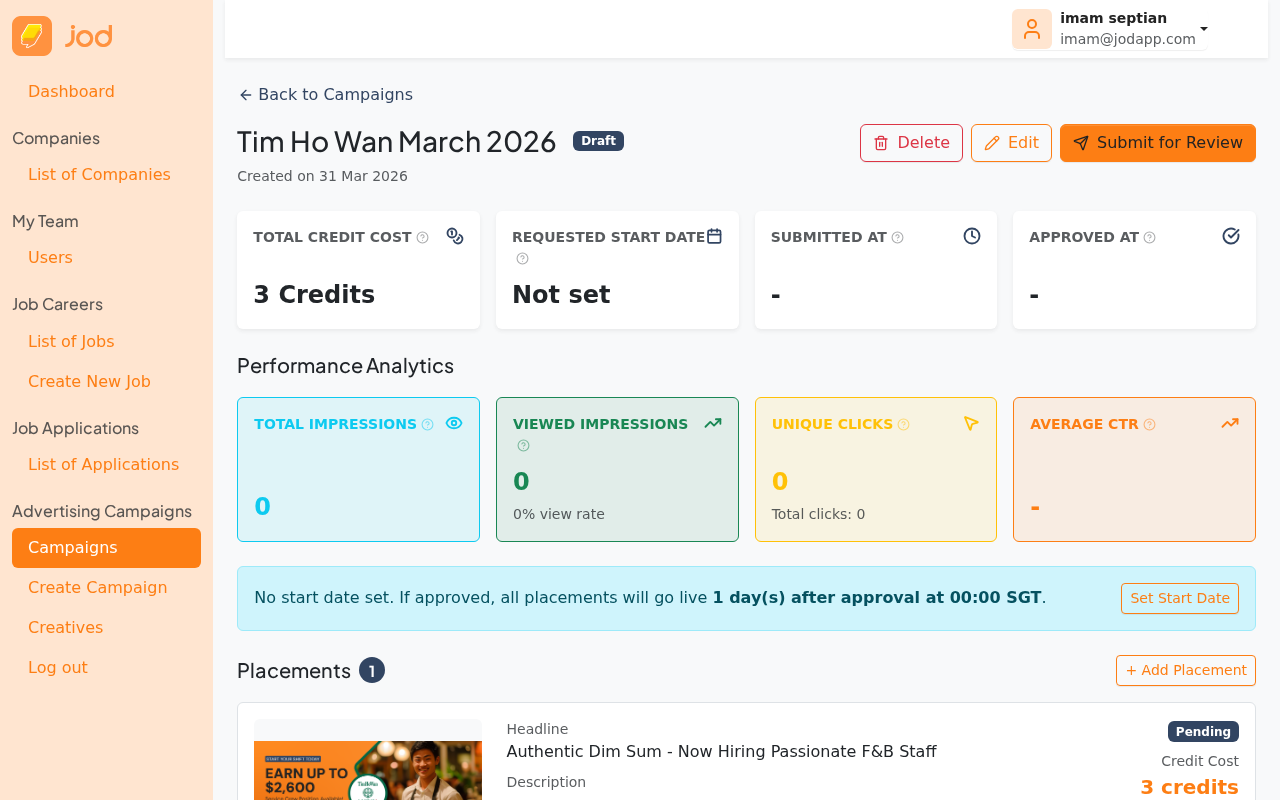
After saving, you will be taken to the campaign detail page. The campaign is in Draft status.
Step 3 — Add a Placement to Your Campaign
Go to the campaign detail page. Since the campaign has no placements yet, click "Create your first placement".
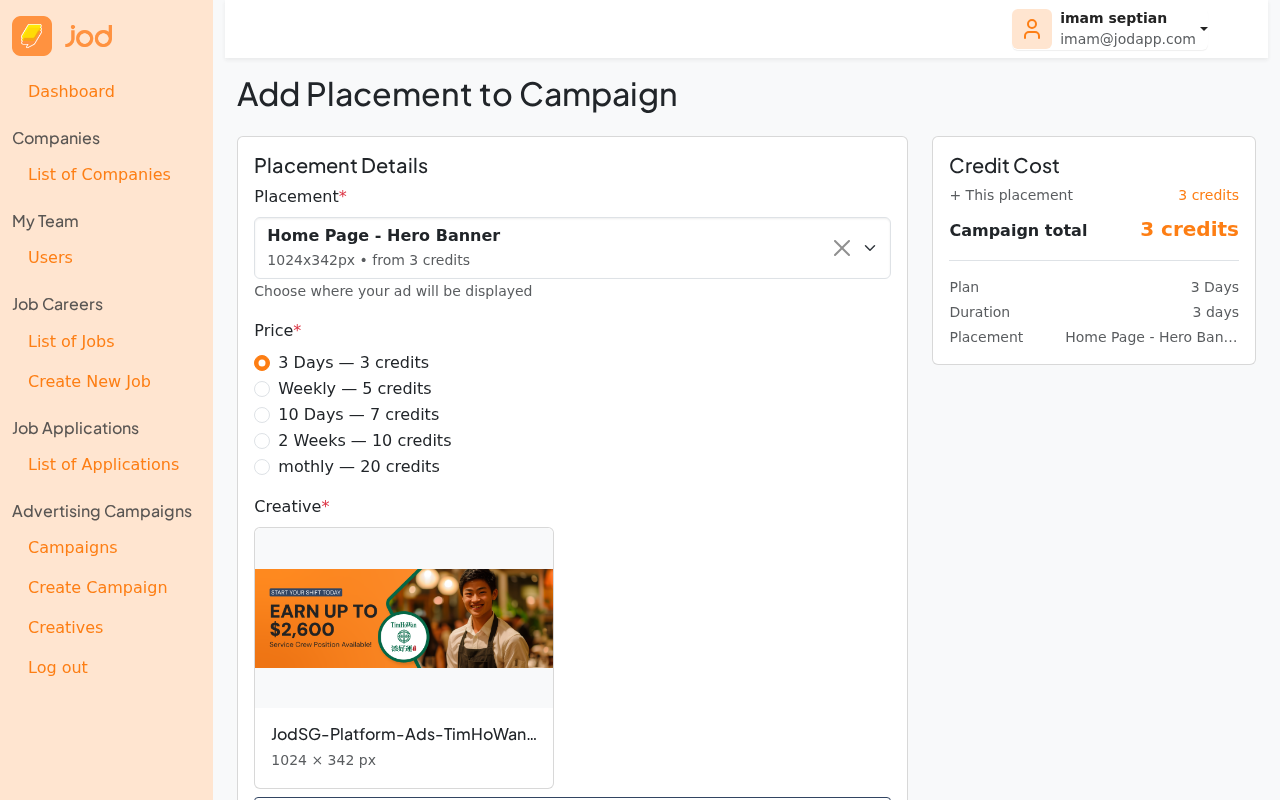
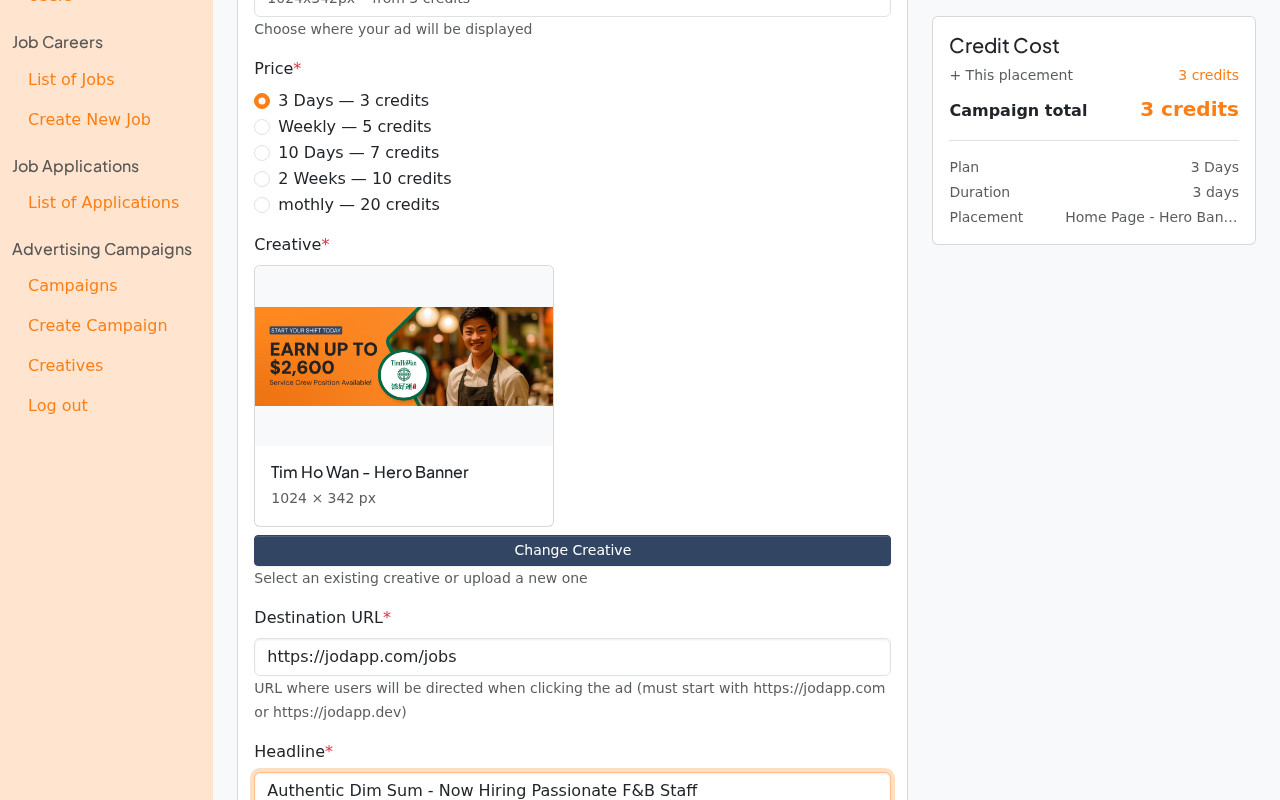
The Add Placement form lets you configure one ad unit within your campaign:
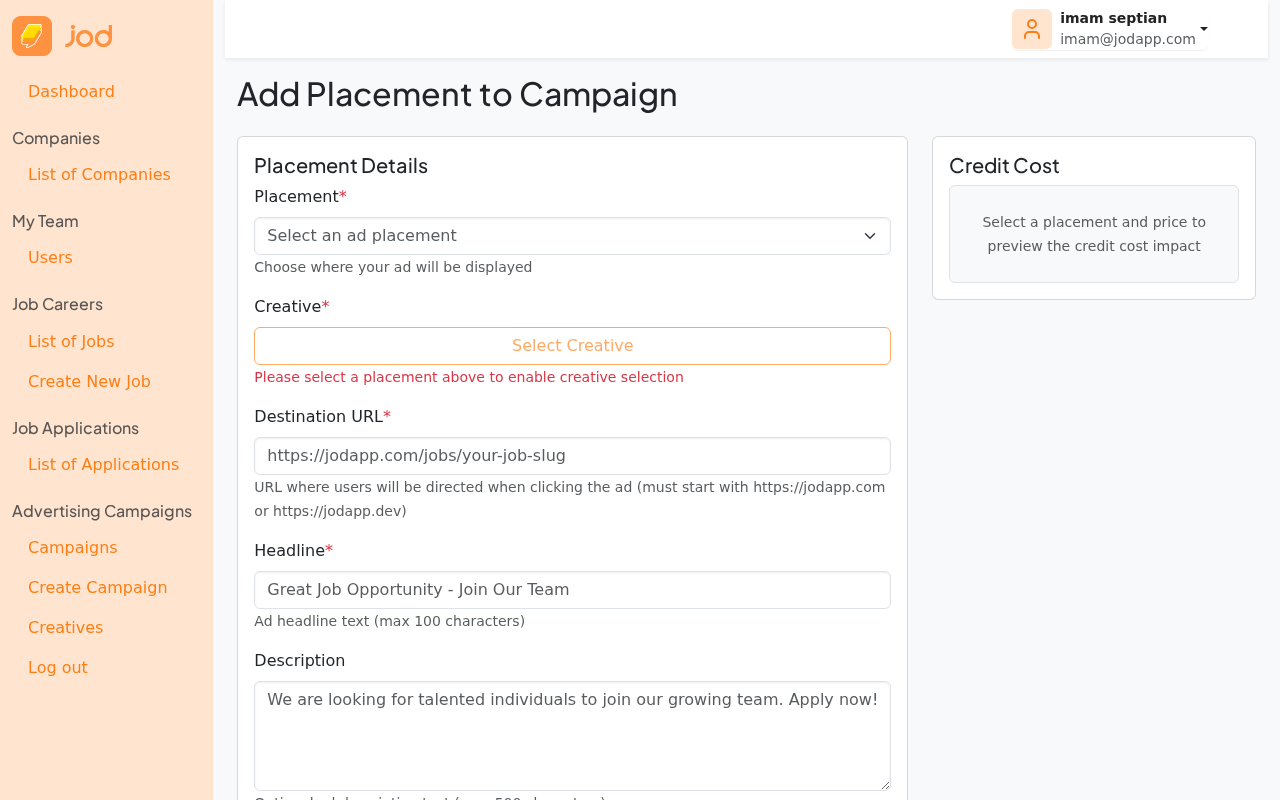
Select a Placement — choose the ad slot (e.g. Home Page - Hero Banner).
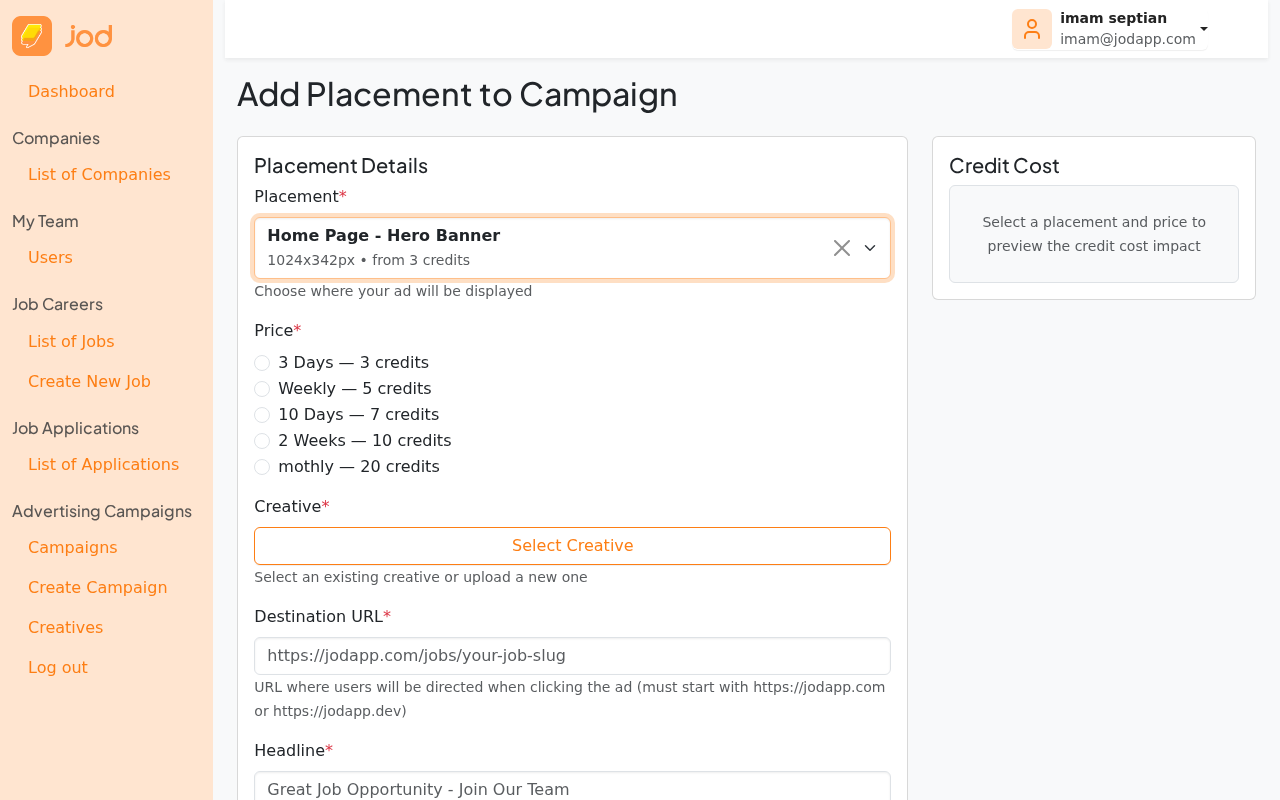
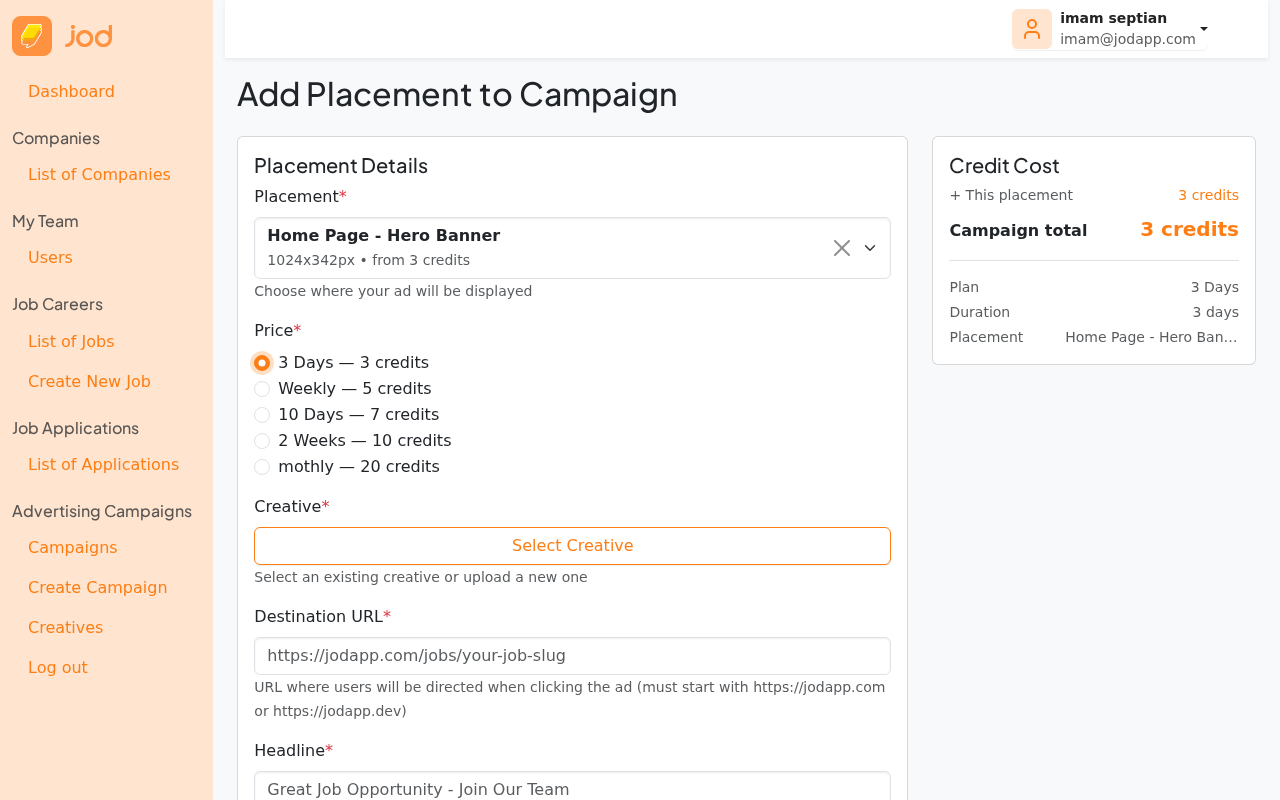
Select a Price — radio buttons appear showing the available durations and credit costs for that slot.
Step 4 — Select or Upload a Creative
Click "Select Creative" to open the creative modal. This modal has two tabs:
- Select Existing — pick from images you have already uploaded
- Upload New — upload a brand new image directly here

If you have no suitable image yet, click the "Upload New" tab. The placement is already pre-filled — the form knows which dimensions to validate against.
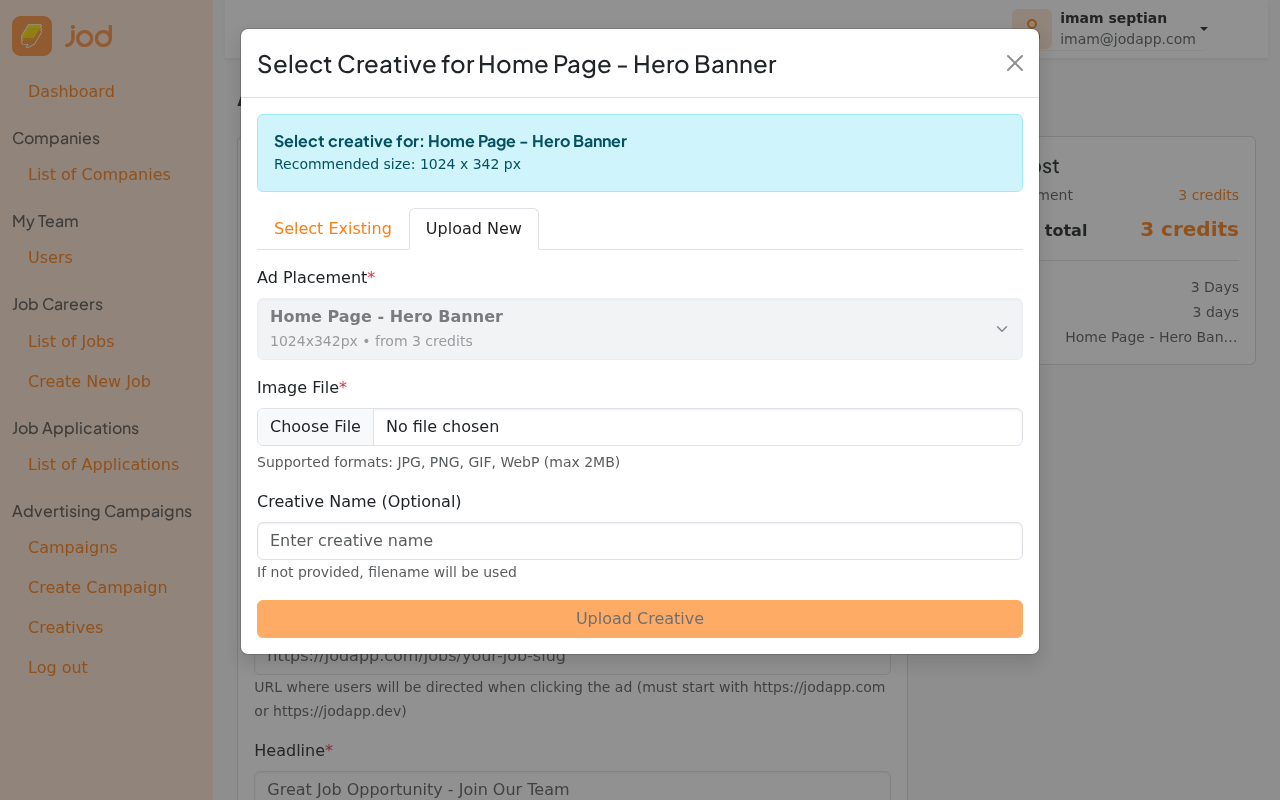
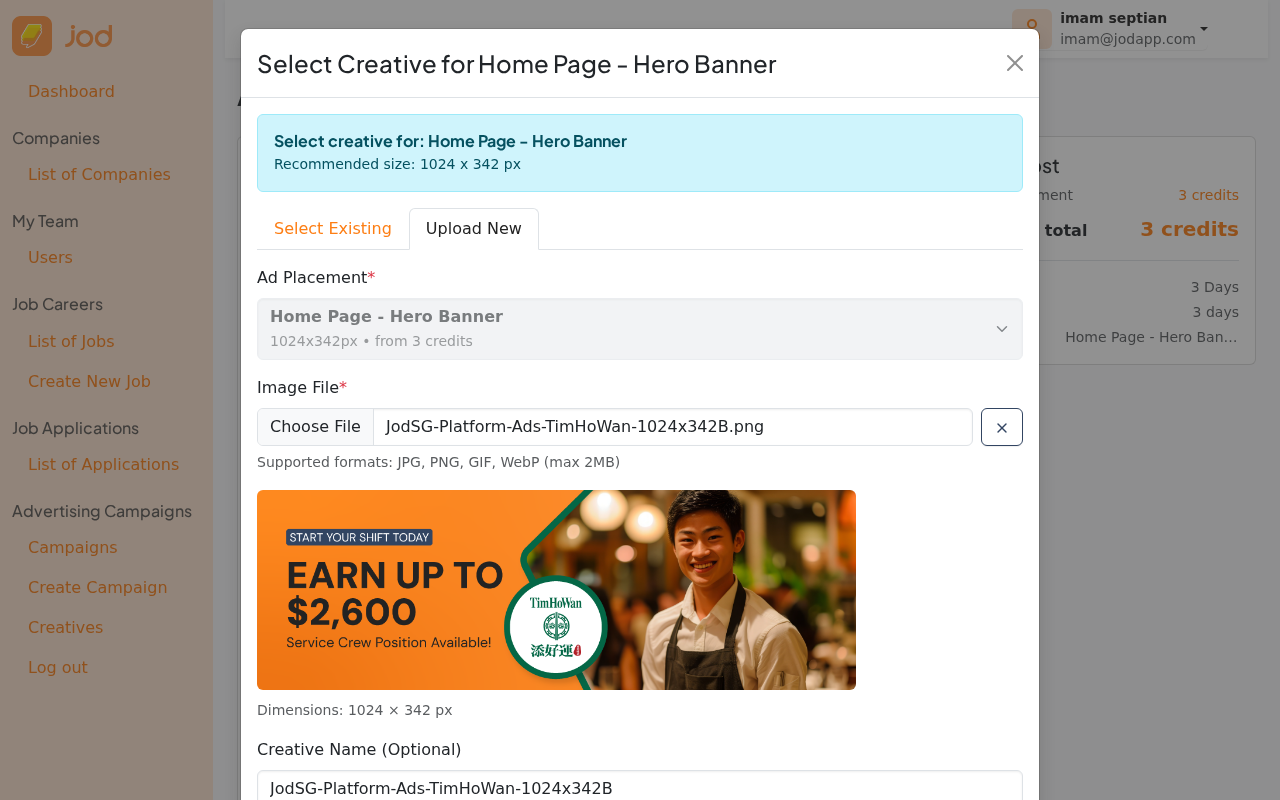
Upload your image (JPG, PNG, WebP — max 2MB). A preview shows the image and its detected dimensions.

Give the creative a name, then click "Upload Creative".
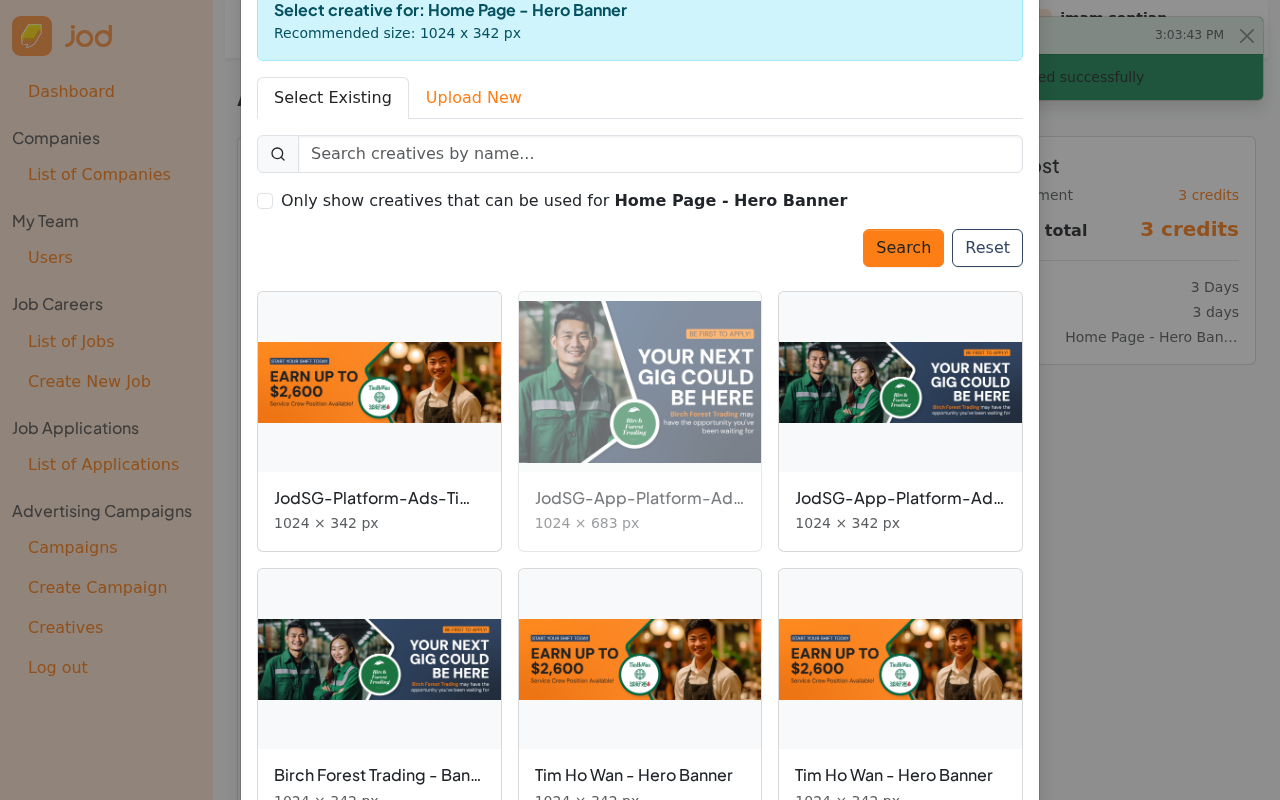
After uploading, the modal automatically switches back to "Select Existing" where your new creative appears. Click it to select it for this placement.
The placement form now shows a preview card of the selected creative.
Step 5 — Complete the Placement
Fill in the Destination URL (where users land when they click the ad — must be a jodapp.com URL) and Headline, then click "Add Placement".
You will return to the campaign detail page with the placement listed.
Click "+ Add Placement" to add more placements to the same campaign.
Creatives are stored in your company's library (Ads → Creatives) and can be reused across campaigns — no need to re-upload the same image. See UC13 for details.
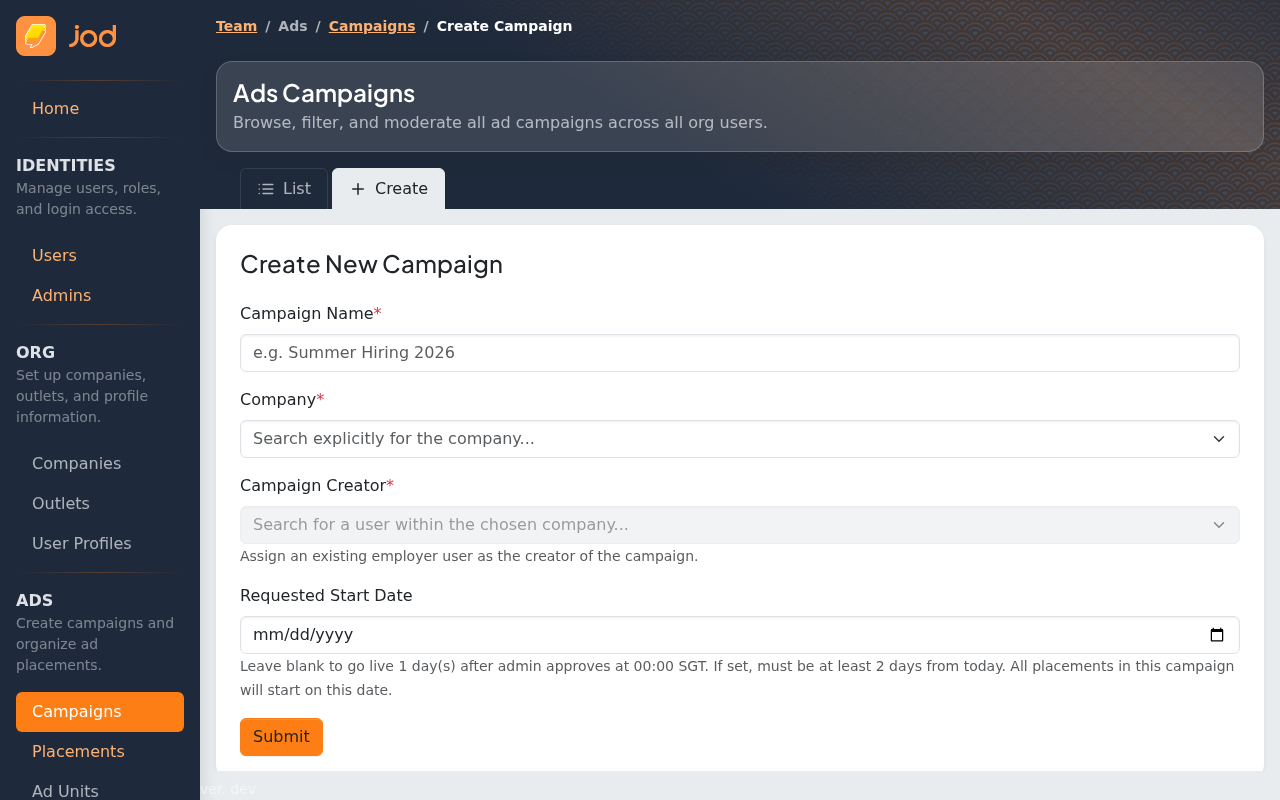
Admin Variant — Creating on Behalf of a Company
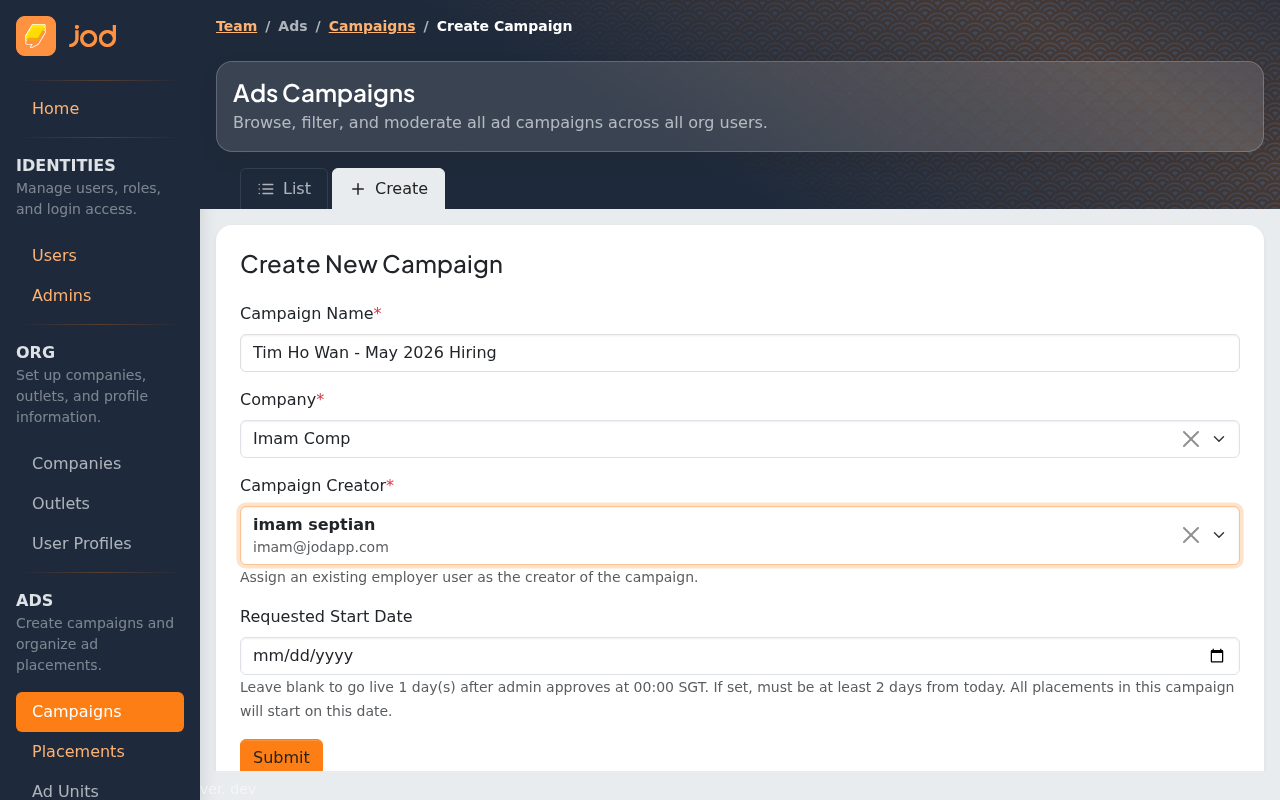
When a company requests help, an admin can create the campaign from Team Portal → Ads → Campaigns → New Campaign. The form is identical except for two extra fields at the top:
- Company — search and select which company this campaign belongs to
- Created By — search and select the user within that company who is the campaign owner (determines who receives email notifications)
After saving, the admin sees the same campaign detail page with the full set of actions: Edit, Add Placement, Submit for Review, and Cancel.
The rest of the flow (add placement, submit, approval) is identical to the company flow above.
UC2 — Submits Campaign for Review
Once you are satisfied with your campaign and all its placements, submit it to the admin team for review.
On the campaign detail page, click "Submit for Review". This button is disabled if the campaign has no placements.

A confirmation modal summarises what you are submitting.
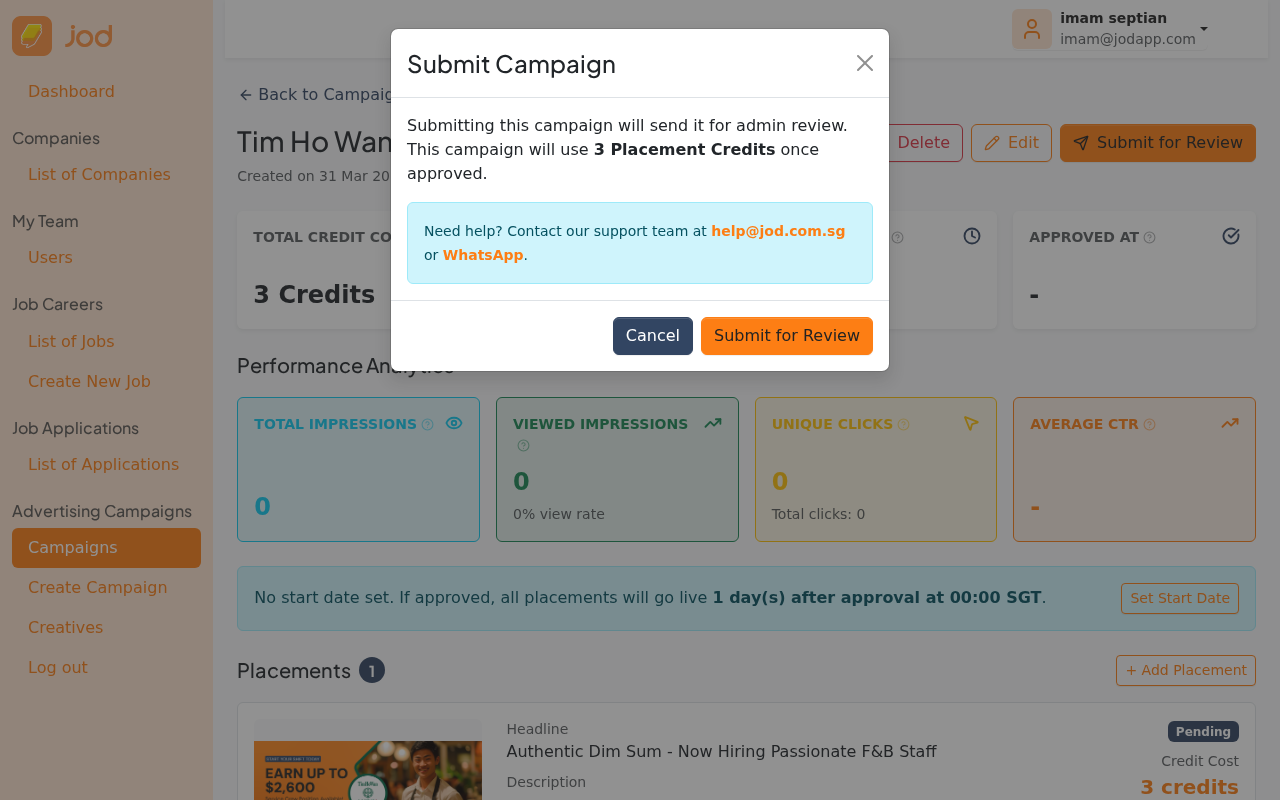
After confirming, the campaign status changes to Pending Review. The campaign is now locked — no edits are possible until the admin reviews it.
In the billing-enabled version: placement credits are reserved at this point. They are not consumed yet — just held until the campaign is approved or rejected.
In the current deployment (no billing): this step has no credit impact.
UC3 — Admin Approves a Campaign
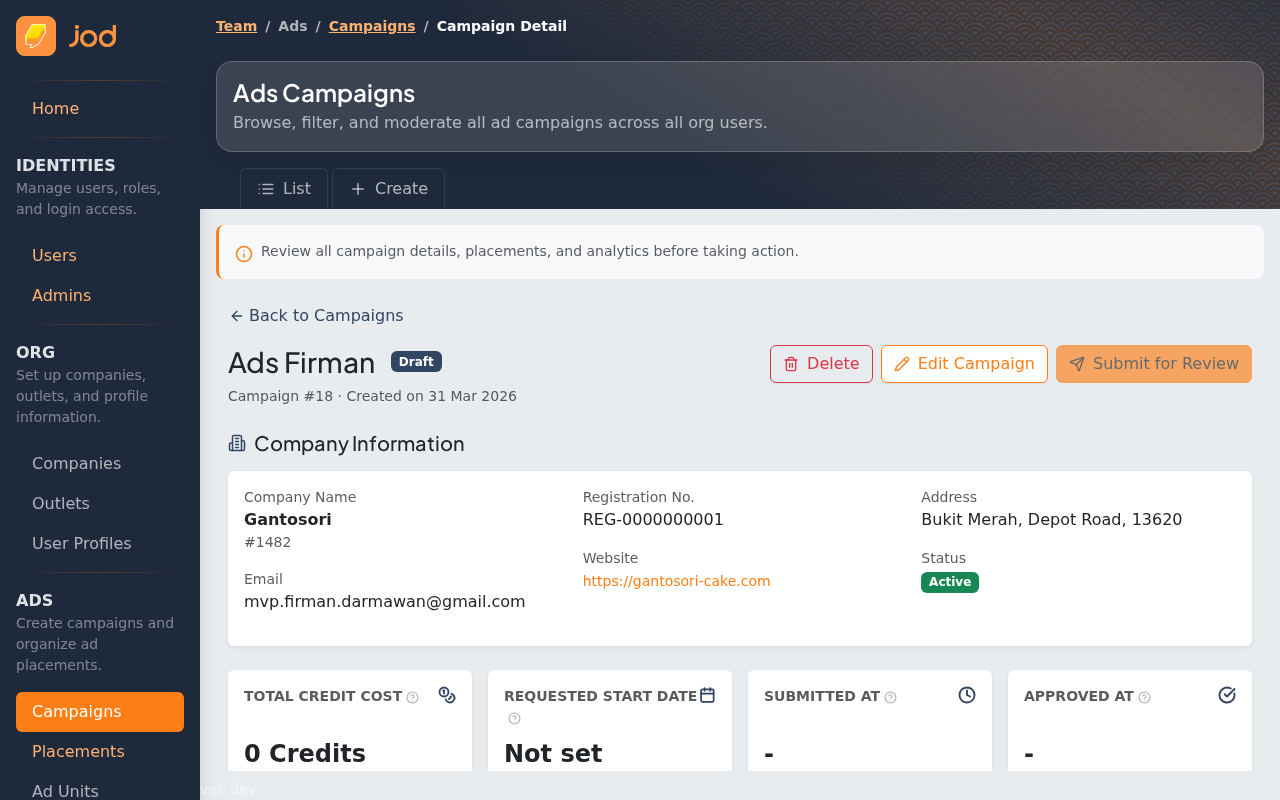
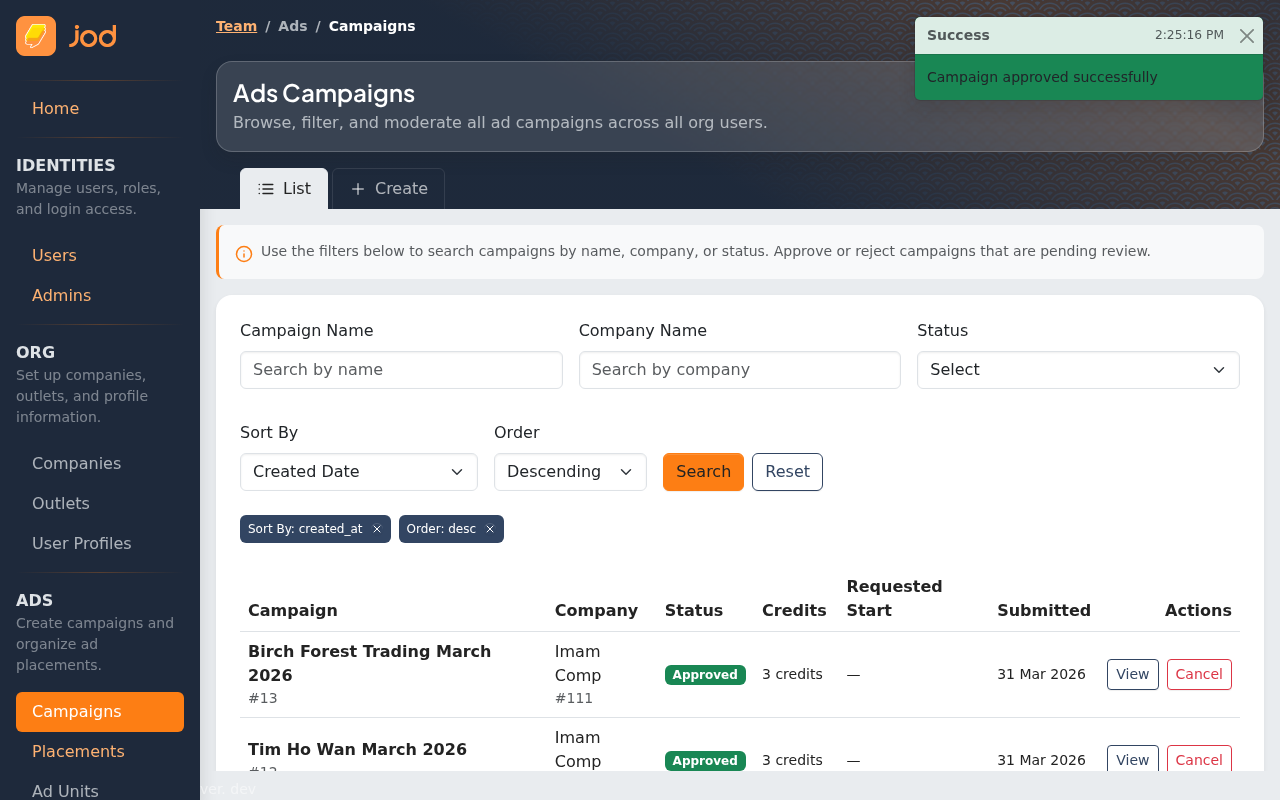
When a campaign is submitted for review, admin can approve or reject it from the Team Portal → Ads → Campaigns page.
Campaign List with Pending Campaigns
The admin campaign list shows all campaigns with their current status. Campaigns in pending_review status display Approve and Reject action buttons directly in the row.

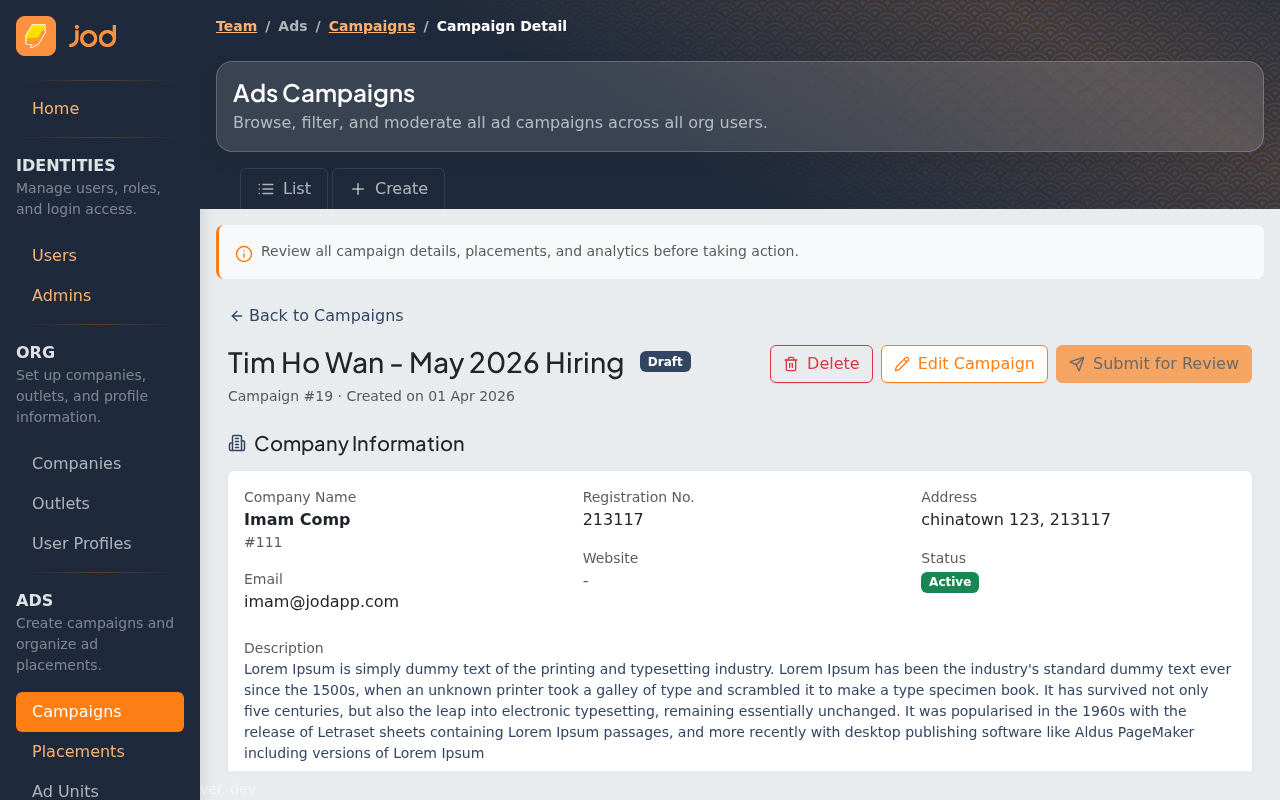
View Campaign Detail
Click "View" to open the campaign detail page and review the placements, creative images, and configuration before approving.

Scroll down on the detail page to review the placement configuration, creative, and scheduling.
Approving
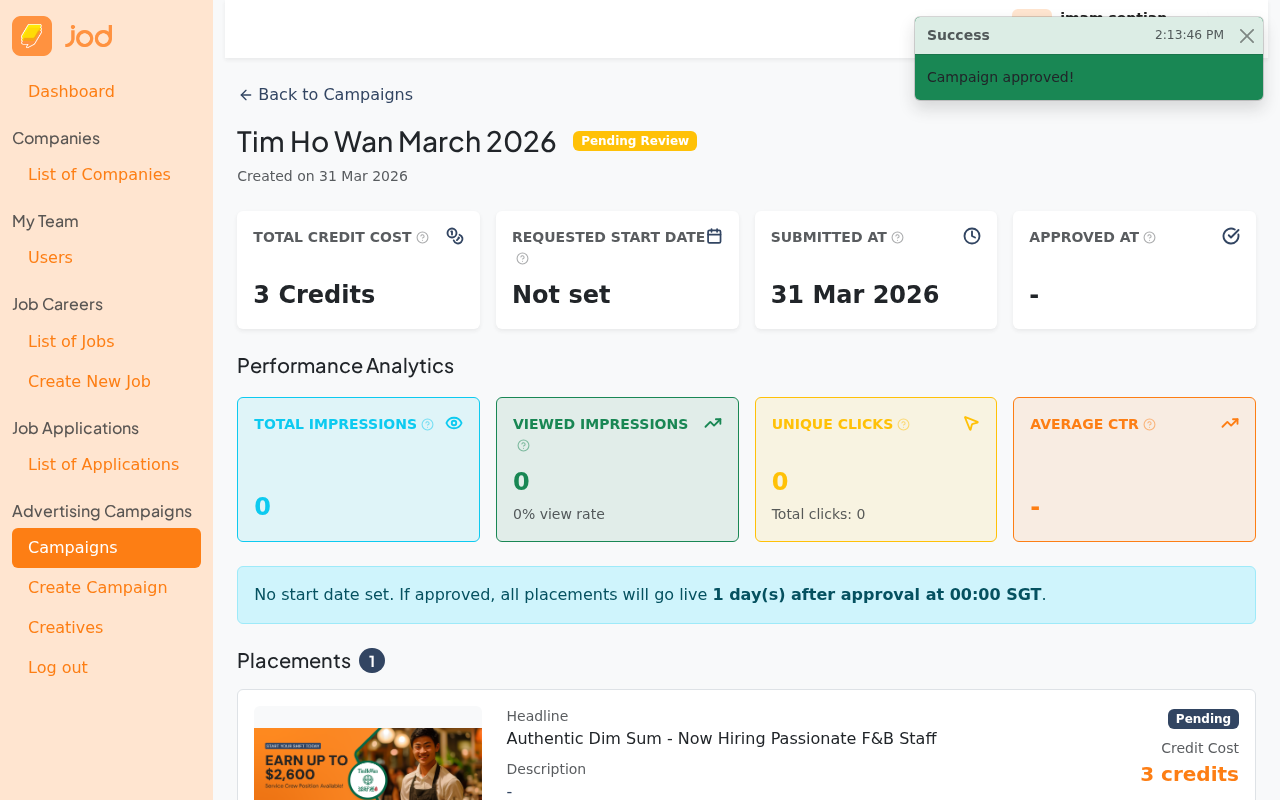
Click "Approve" on the campaign row (or from the detail page). A confirmation modal appears showing what will happen — start dates and placement activation schedule.
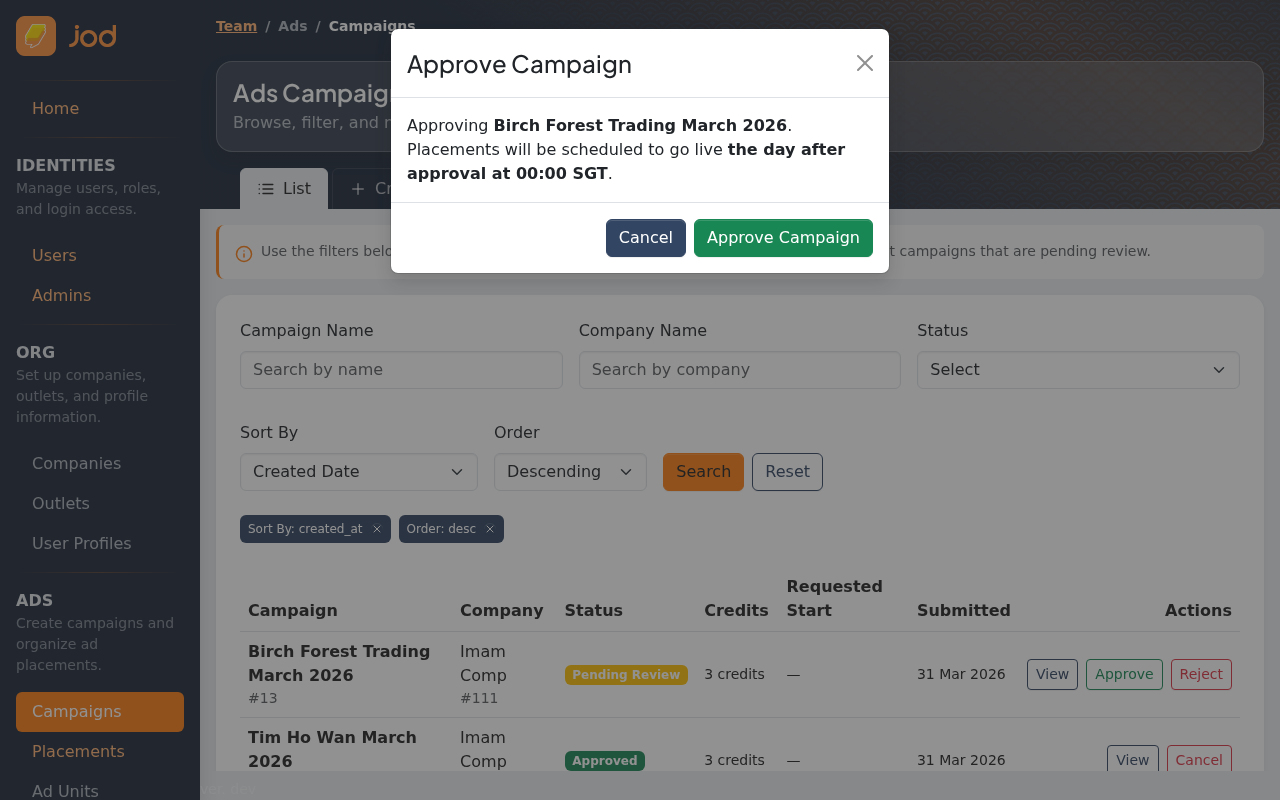
After confirming, the campaign status changes to Approved. Each placement is scheduled to go live on the requested start date (or the next day if no date was set).
- If the company set a future start date → placements activate on that date automatically
- If no start date was set → placements go live the next day after approval at 00:00 SGT
- If the admin approves after the requested start date has already passed → placements go live immediately
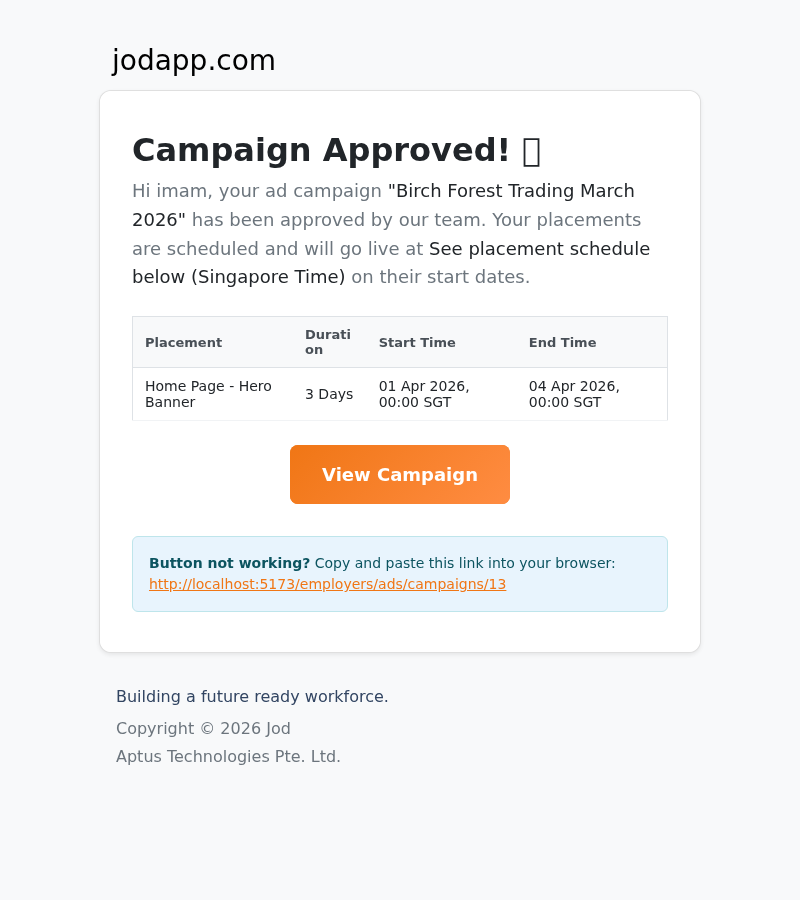
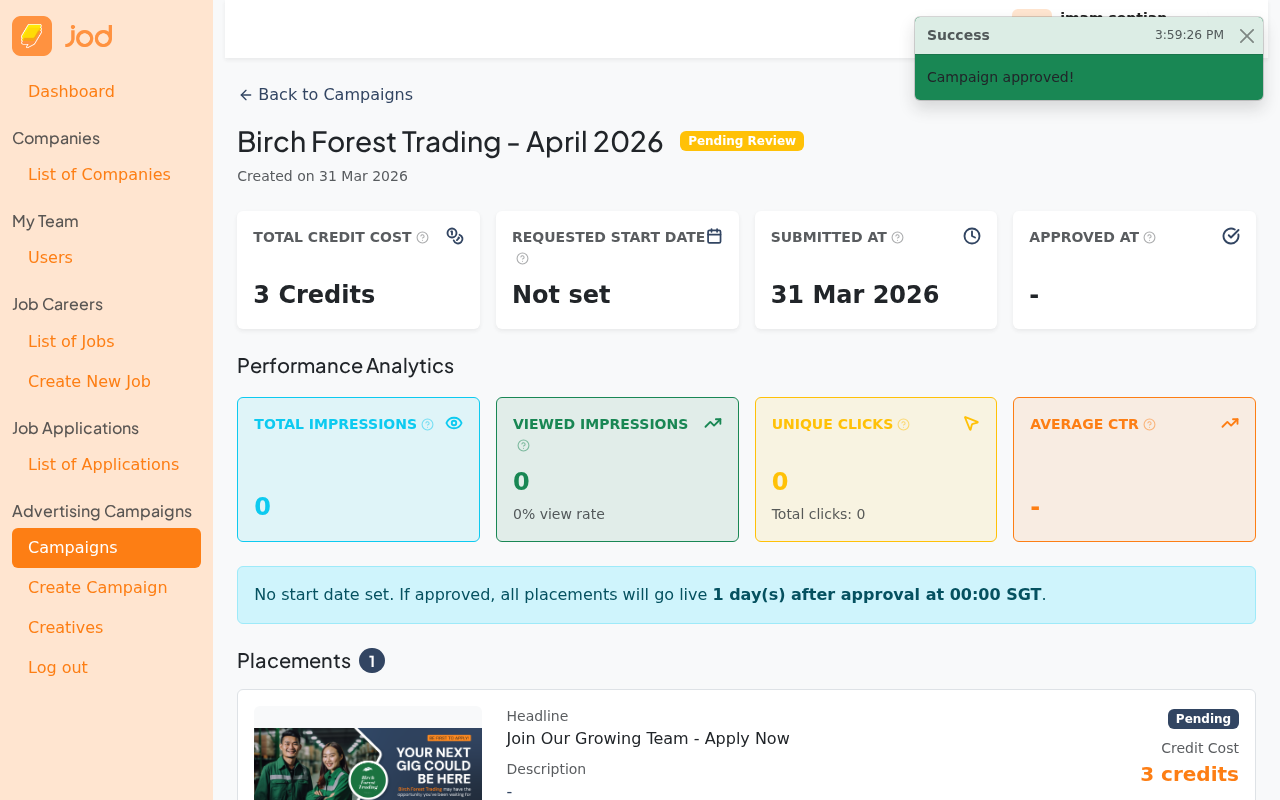
Approval Email Notification
After approval, the system automatically sends an email to the company contact who created the campaign. The email confirms the campaign name and includes the placement schedule.
UC4 — Admin Rejects a Campaign
If a campaign has issues (e.g. inappropriate creative, wrong dimensions, invalid URL), the admin rejects it with a note explaining what needs to be fixed.
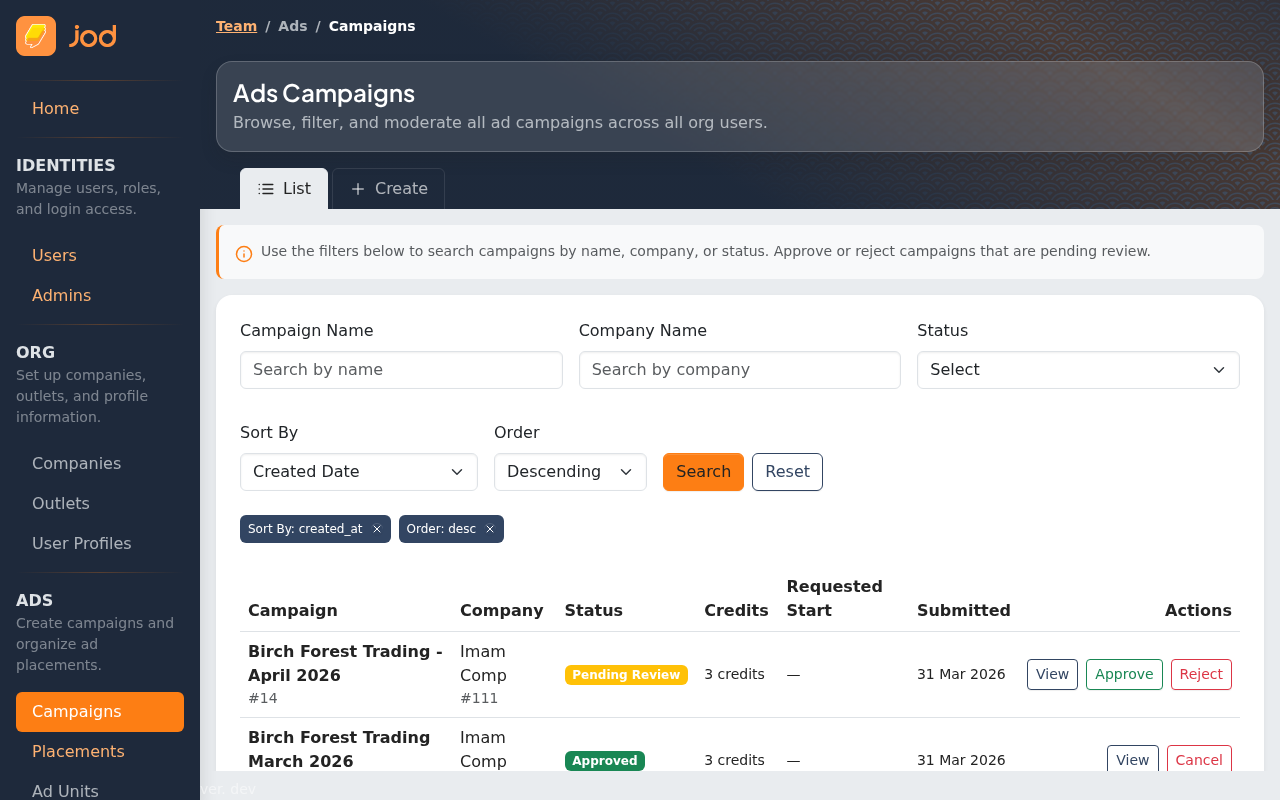
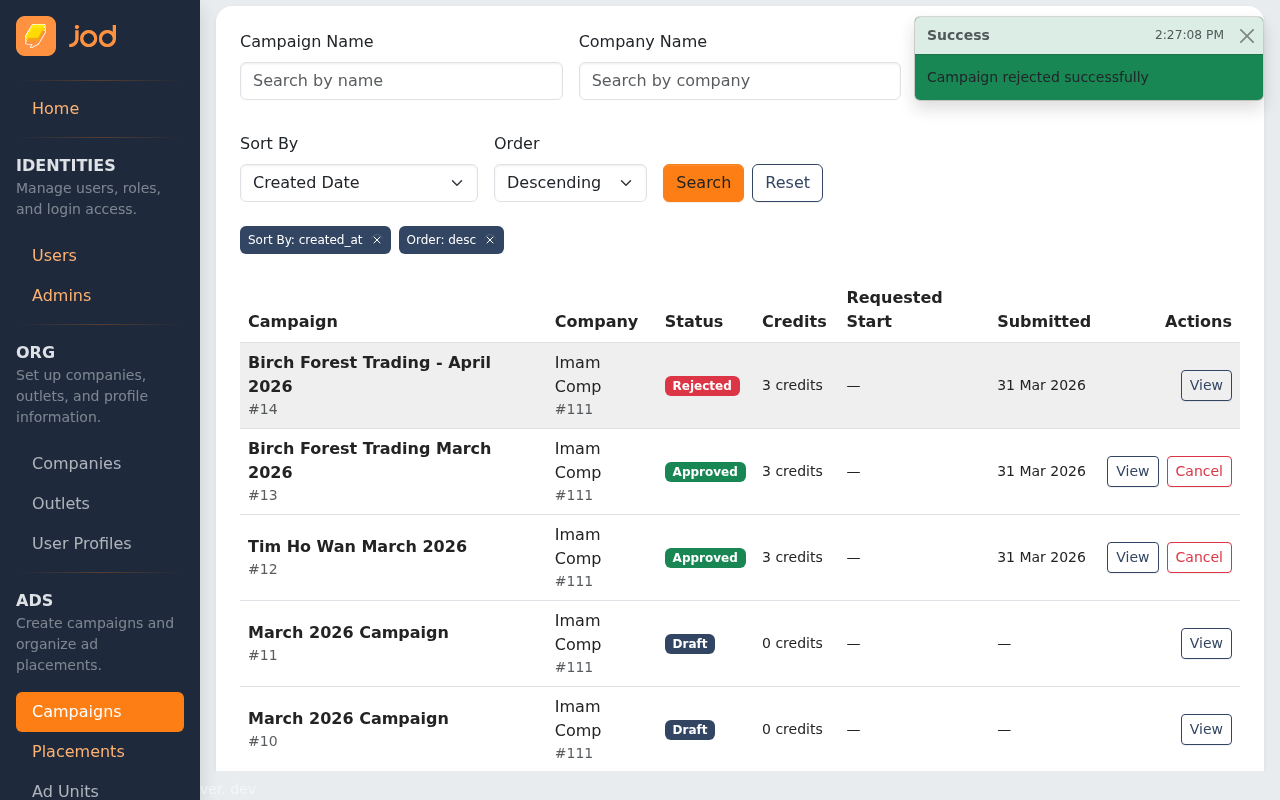
Campaign List — Reject Button
The Reject button appears next to Approve for pending_review campaigns.
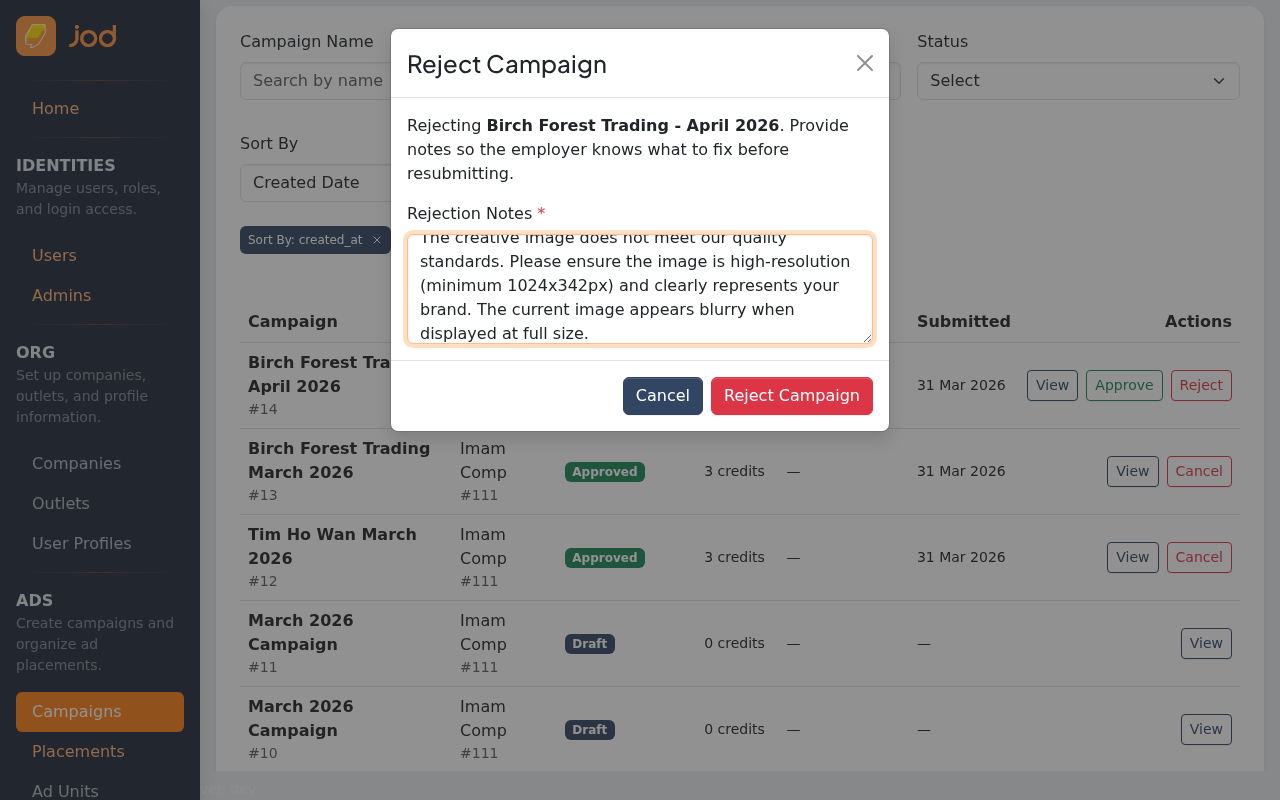
Rejection Dialog
Click "Reject". A dialog box appears where you must enter a rejection note explaining the issue to the company.
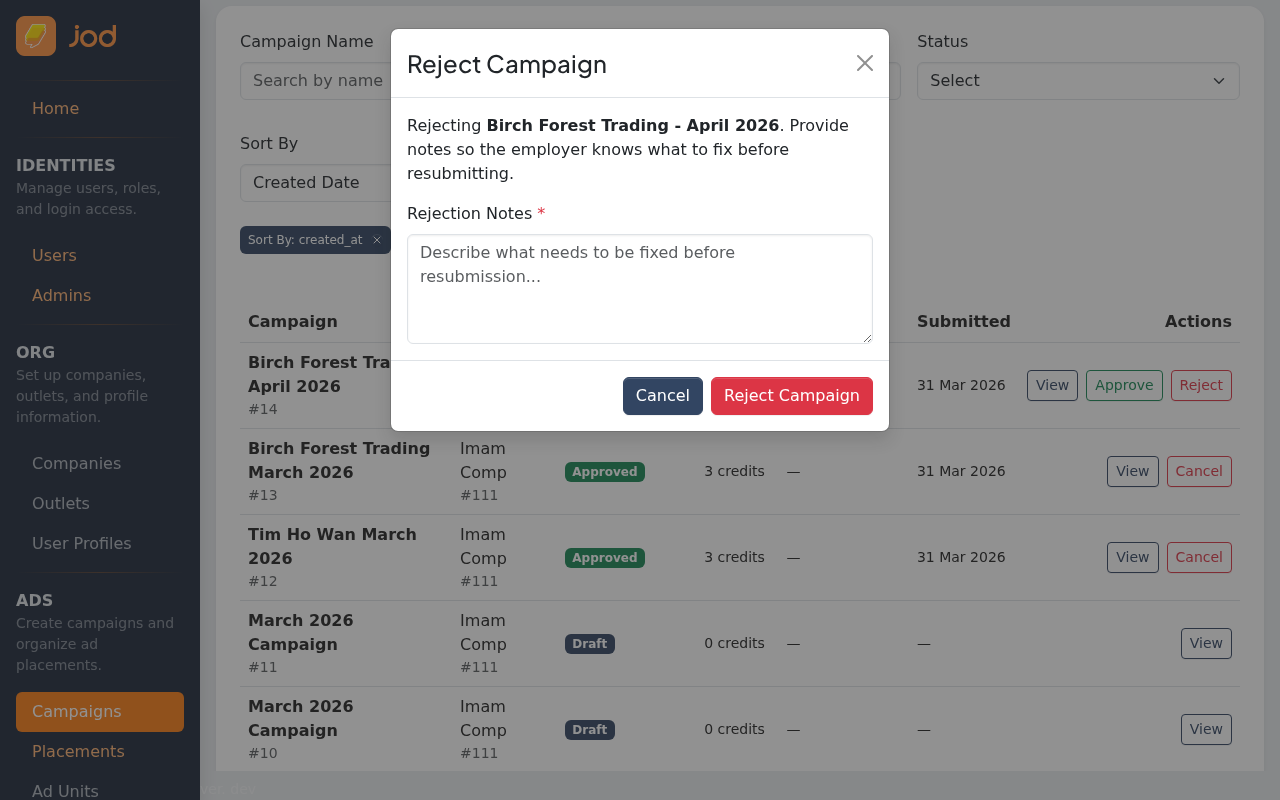
Write a clear, helpful note so the company knows exactly what to fix.
After confirming, the campaign is rejected and the company's credits are released back (in billing-enabled mode).
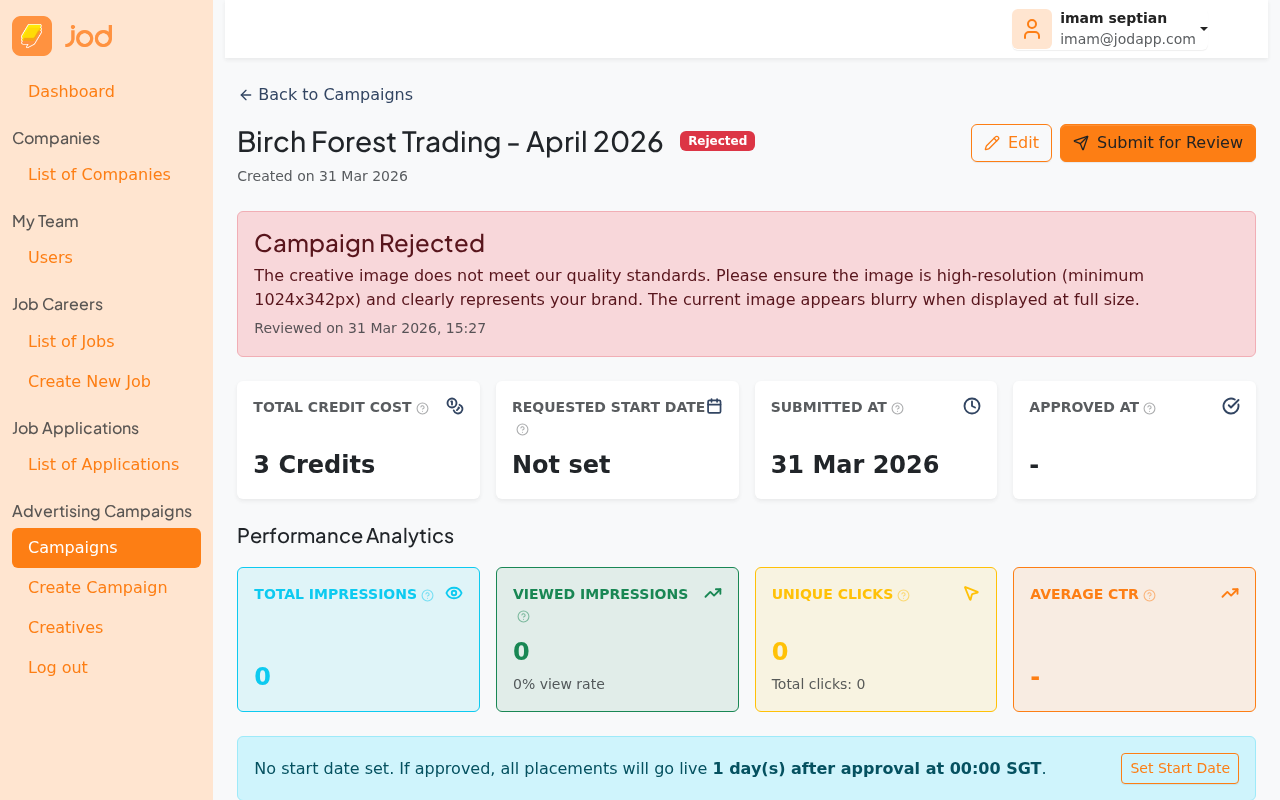
Company Sees the Rejection
On the company side, the campaign detail page shows the rejection with the admin's notes. The campaign is editable again — the company can fix the issues and re-submit.

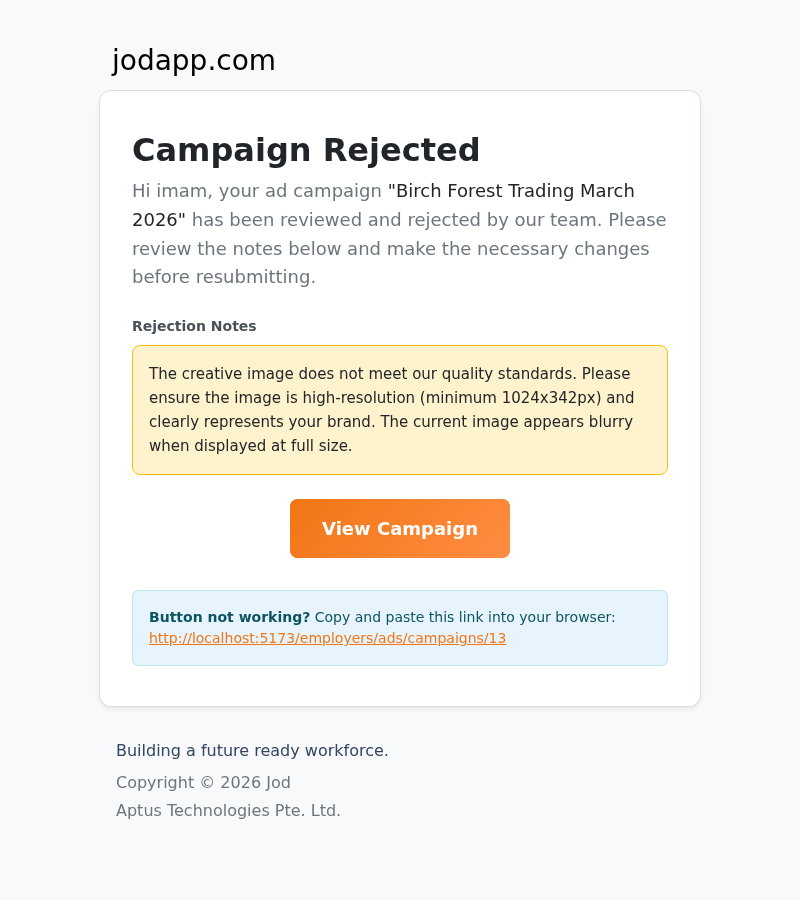
Rejection Email Notification
The company contact also receives an email notification explaining that the campaign was rejected and including the admin's rejection notes.
UC5 — Company Revises and Resubmits After Rejection
After a rejection the company can edit their campaign placements and resubmit without creating a new campaign.
Step 1 — Review the Rejection Note
The rejection note from admin is shown as a red alert at the top of the campaign detail page. The campaign status is back to a state where edits are allowed.
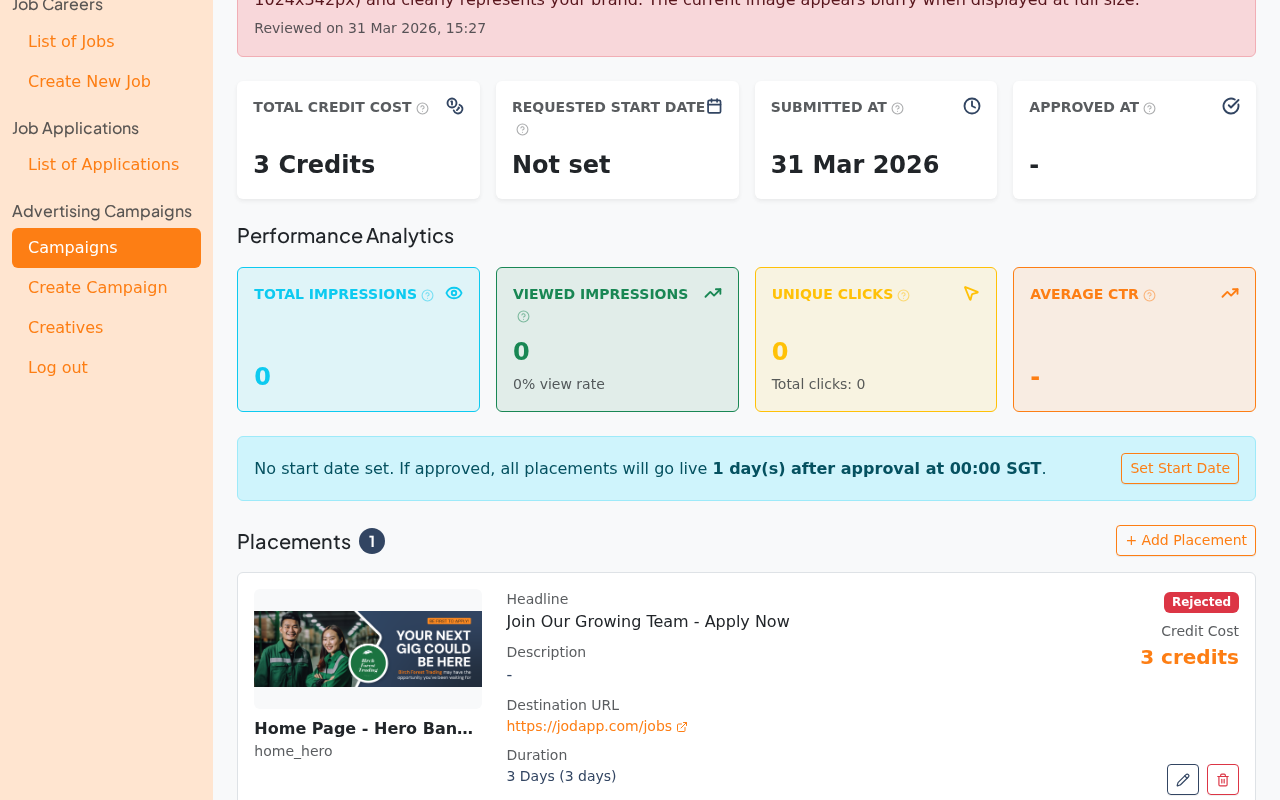
Scroll down to see the existing placements. An Edit button is available on each placement.
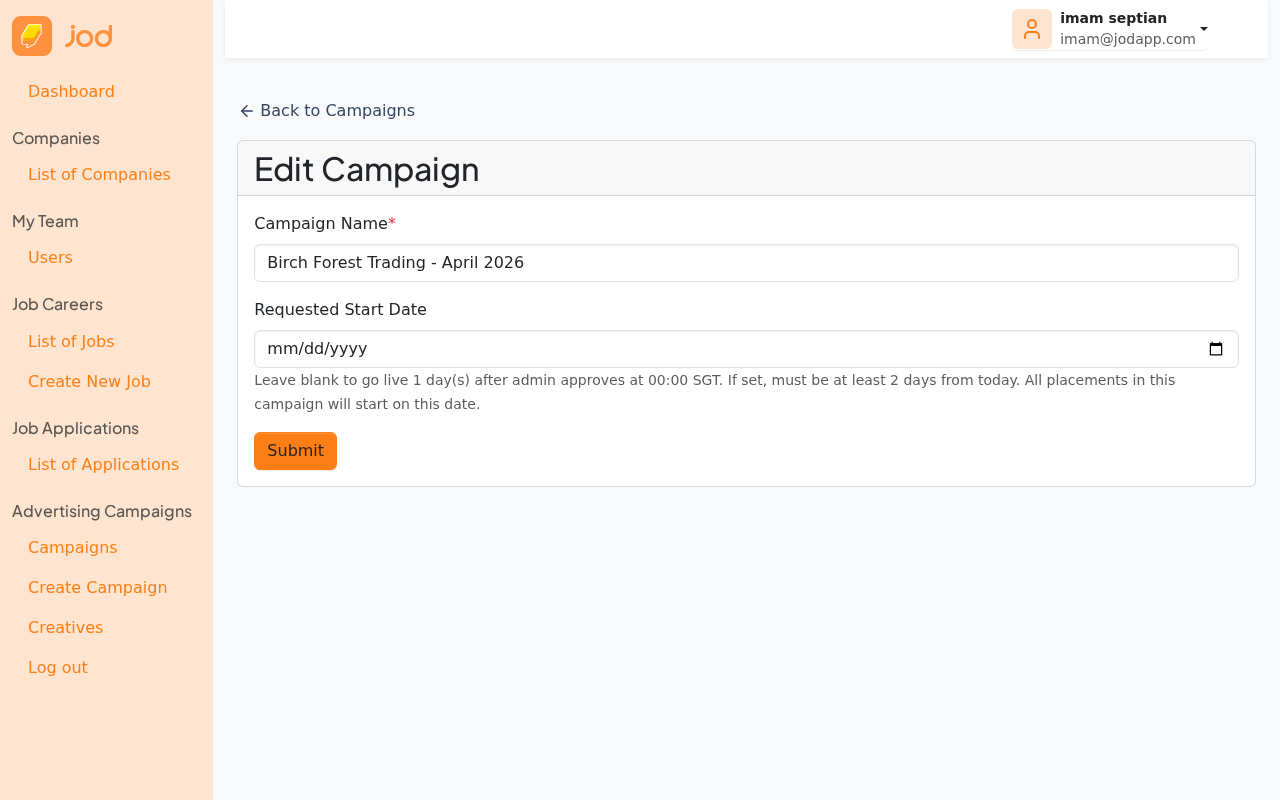
Step 2 — Edit the Placement
Click Edit on the placement that needs fixing. The edit form looks identical to the add-placement form.
Click "Change Creative" (or "Select Creative") to open the creative modal and upload or swap the image.
Step 3 — Resubmit
Once the fix is saved, click "Submit for Review" on the campaign detail page. The same confirmation modal appears.
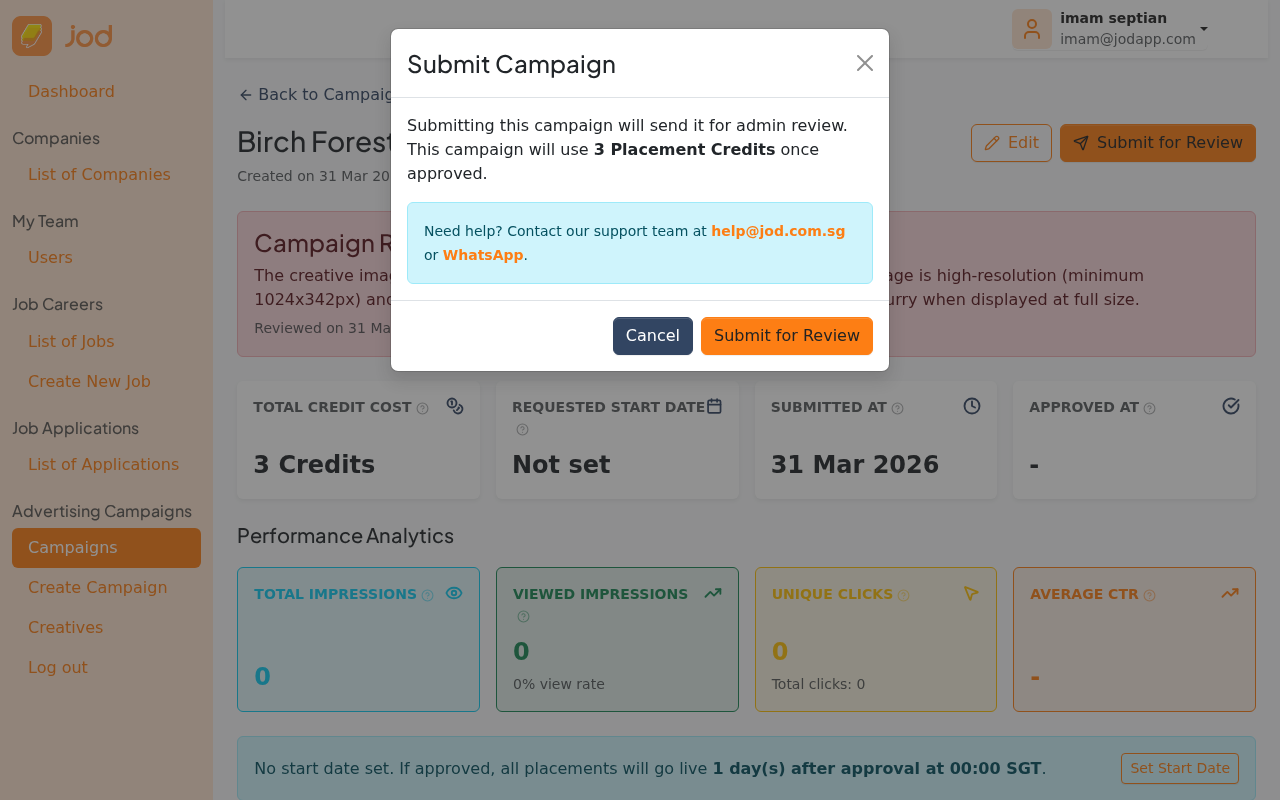
After confirming, the campaign returns to pending_review and waits for admin to review again.
UC6 — Campaign Placement Goes Live (Scheduled → Active)
This is an automatic process — no manual action needed.
A daily background job runs and checks for placements where start_time ≤ now. Matching placements transition from Scheduled → Active and start appearing on the website.
If the admin approves a campaign after its requested start date has already passed, the placement goes live immediately at approval time — it never enters "Scheduled" state.
UC7 — Marketplace Serves an Ad (What Visitors See)
When a visitor opens a page on jodapp.com that contains an ad slot, the ad appears automatically. Here is what it looks like from a visitor's perspective.
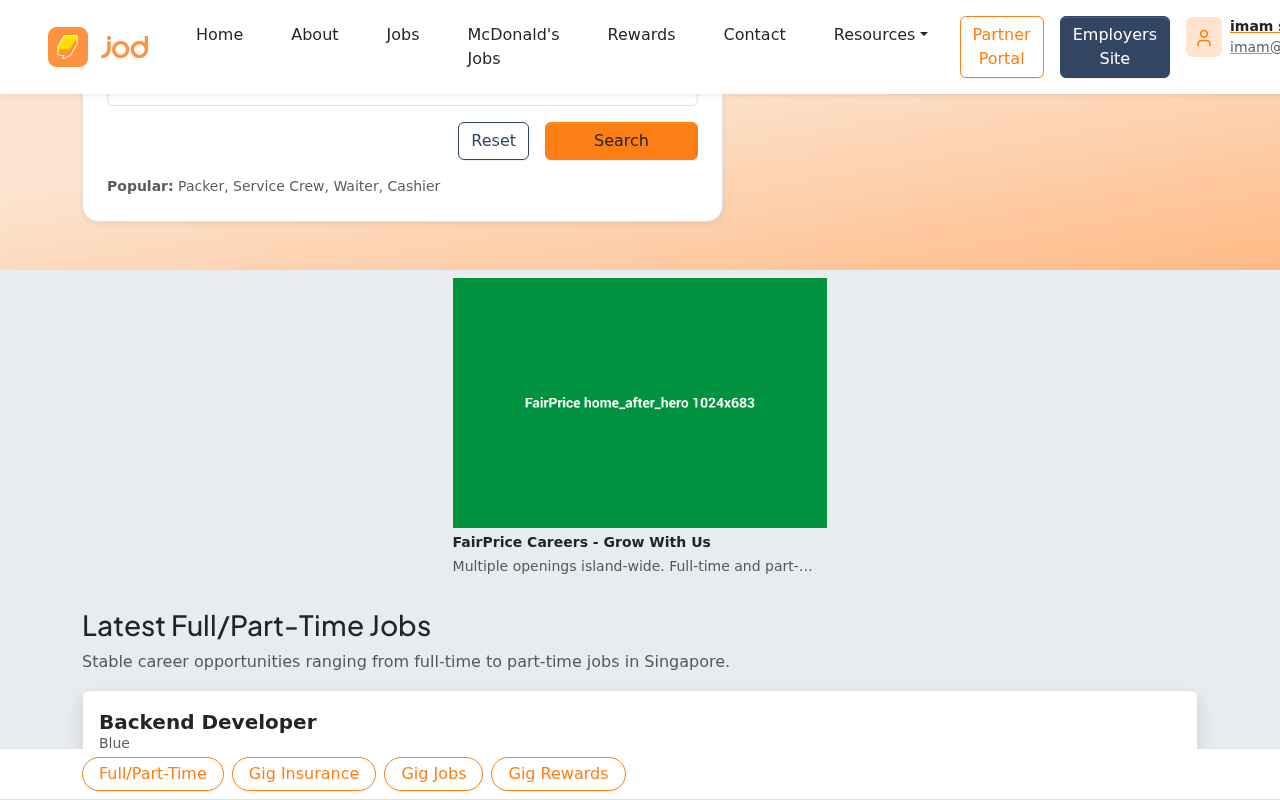
Home page — Hero Banner
The top of the home page shows the hero banner ad.

Scrolling down reveals additional ad slots further down the page.
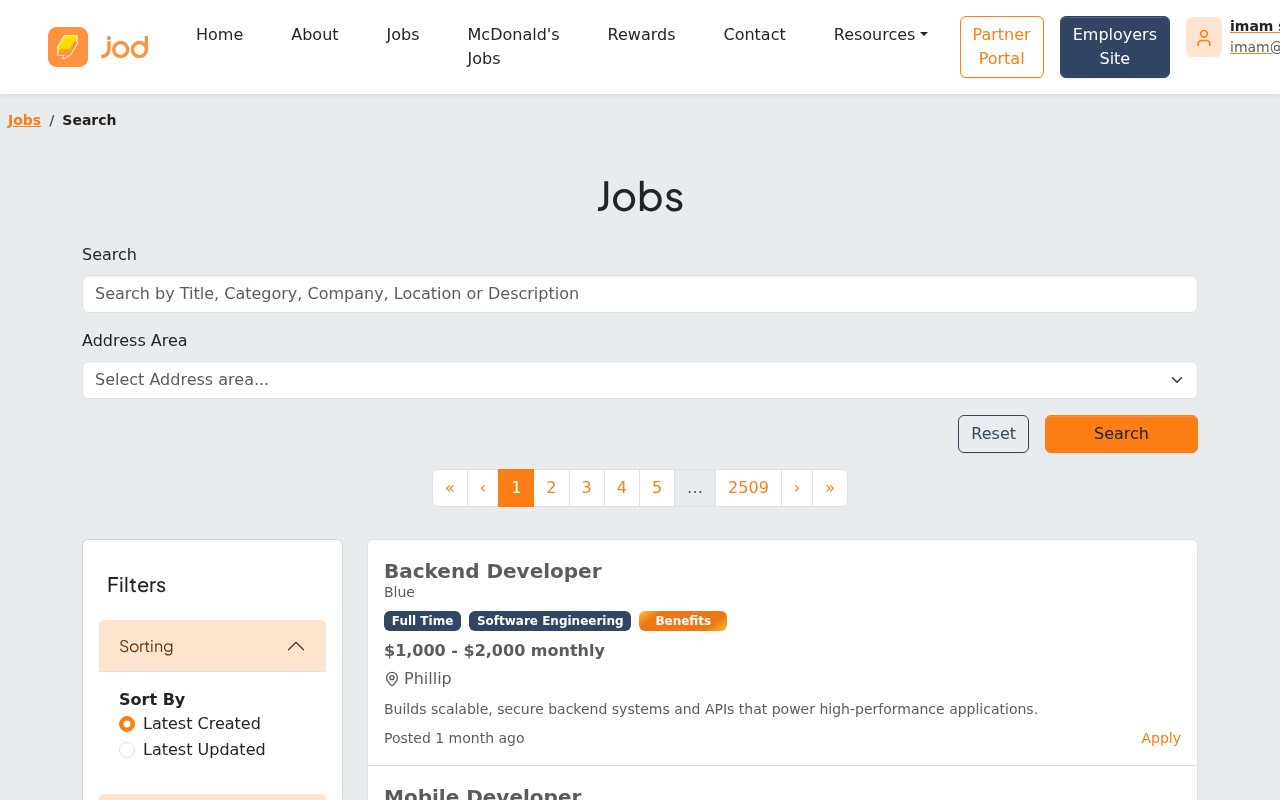
Job Listings page
An inline ad appears between job listings in the search results.
How serving works (for reference)
When a page loads an ad slot, the system:
- Finds all active placements for that slot
- Uses fair rotation — picks the placement that was served least recently, so all active advertisers get equal exposure
- Records an impression and returns the ad data to the browser
If no active ads exist for a slot, the slot falls back to Google AdSense — no blank space is ever shown to visitors.
UC8 — Daily Credit Consumption
This use case applies once billing is enabled. Currently, credits are not consumed.
Each day, for every active placement, the system deducts a proportional credit amount:
daily_units = credit_cost_snapshot ÷ duration_days
Credits are consumed from the reserved hold. Revenue is recognised proportionally each day.
UC9 — User Views an Ad (Viewport Tracking)
When an ad enters the user's visible area (viewport), the browser fires a beacon:
PATCH /marketplace/ads/impressions/:uuid/viewed
This marks the impression's viewed_at timestamp. An ad served (UC7) but never scrolled into view will have a null viewed_at. This distinction drives the View Rate metric in analytics.
UC10 — User Clicks an Ad
When a user clicks the ad:
- The browser redirects to an API endpoint that records a Click (tied to the impression and placement)
- The user is then redirected to the campaign's
destination_url
Click tracking is server-side, so it works even with ad-blockers or script restrictions.
UC11 — Campaign Cancelled
Either the company or an admin can cancel an approved campaign at any time — for example, if a promotion ends early or the ad content is no longer valid.
How to Cancel
On the campaign detail page, the "Cancel Campaign" button appears for approved campaigns.

Click it. A confirmation modal explains what will happen.
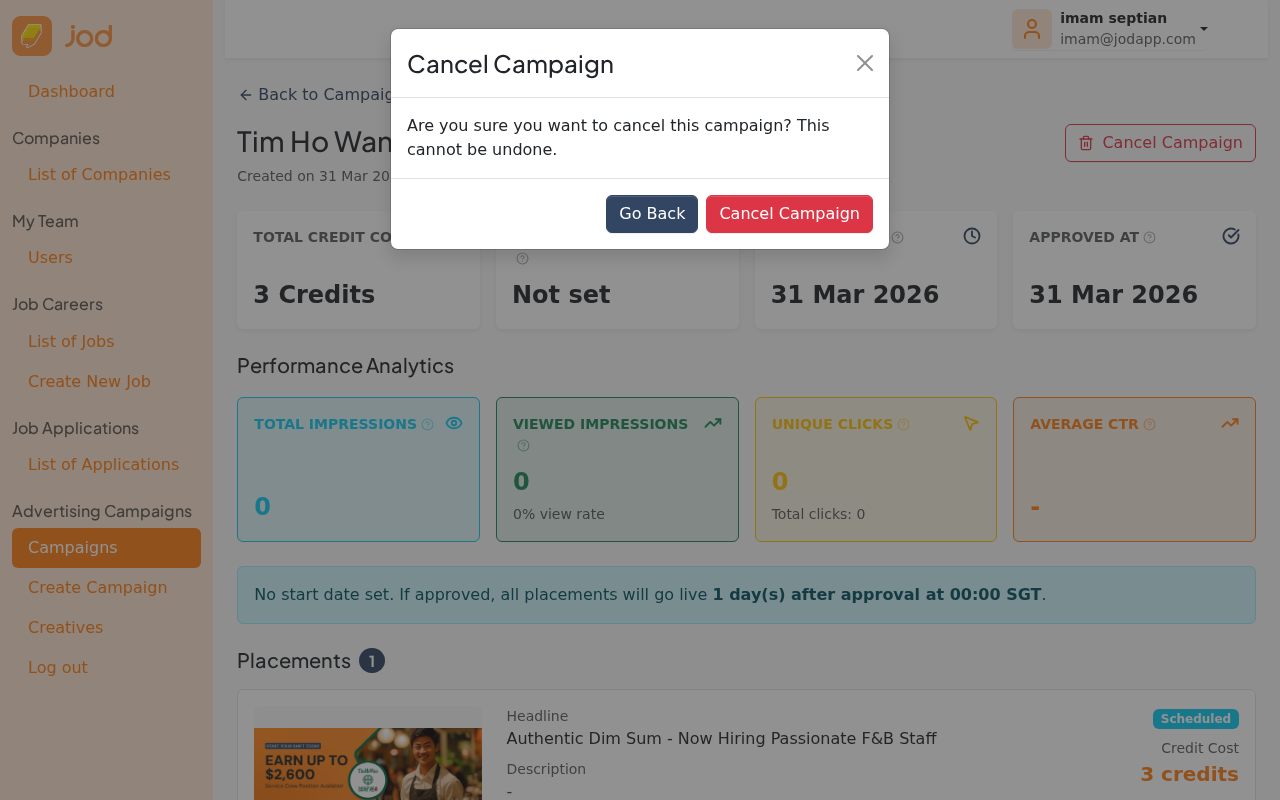
After confirming, the campaign status changes to Cancelled. All running placements stop immediately.
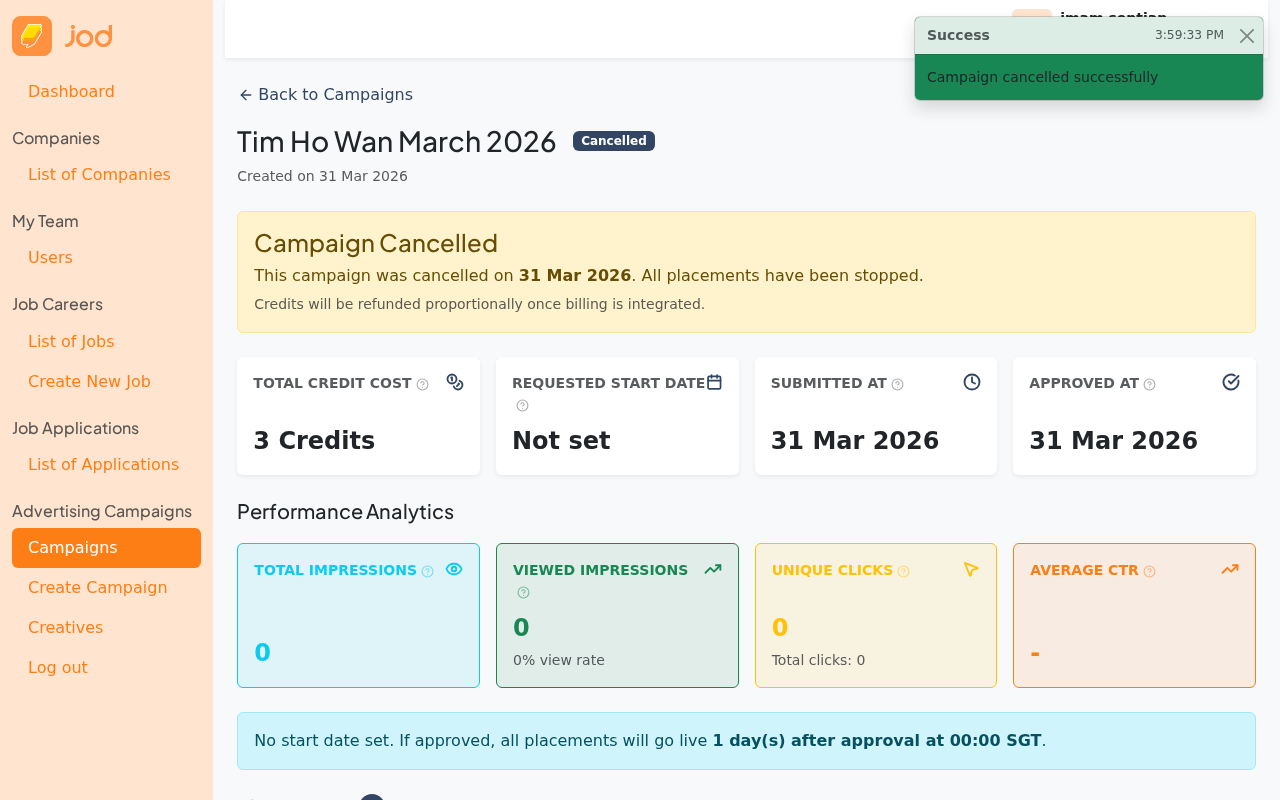
What happens to credits?
- All scheduled and active placements are stopped immediately
- Reserved credits for unused days are released back to available (billing-enabled mode)
- Credits already consumed (for days the ad was already running) are not refunded
- The campaign record stays visible in the dashboard for reference
There is currently no "pause" feature. If you need to temporarily stop a campaign, cancel it and create a new one when ready to resume.
UC12 — Company Views Campaign Analytics
The campaign detail page shows real-time analytics for each placement.
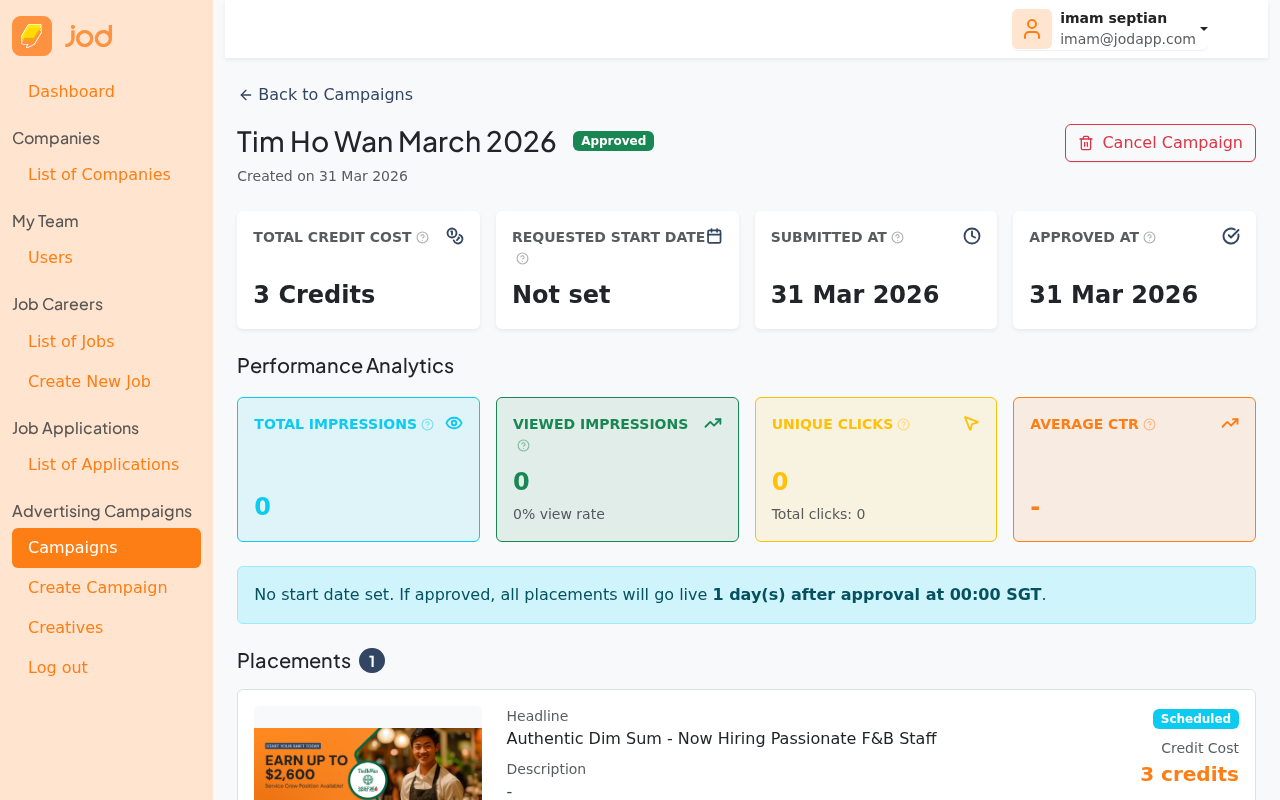
Scroll down to see placement-level stats.
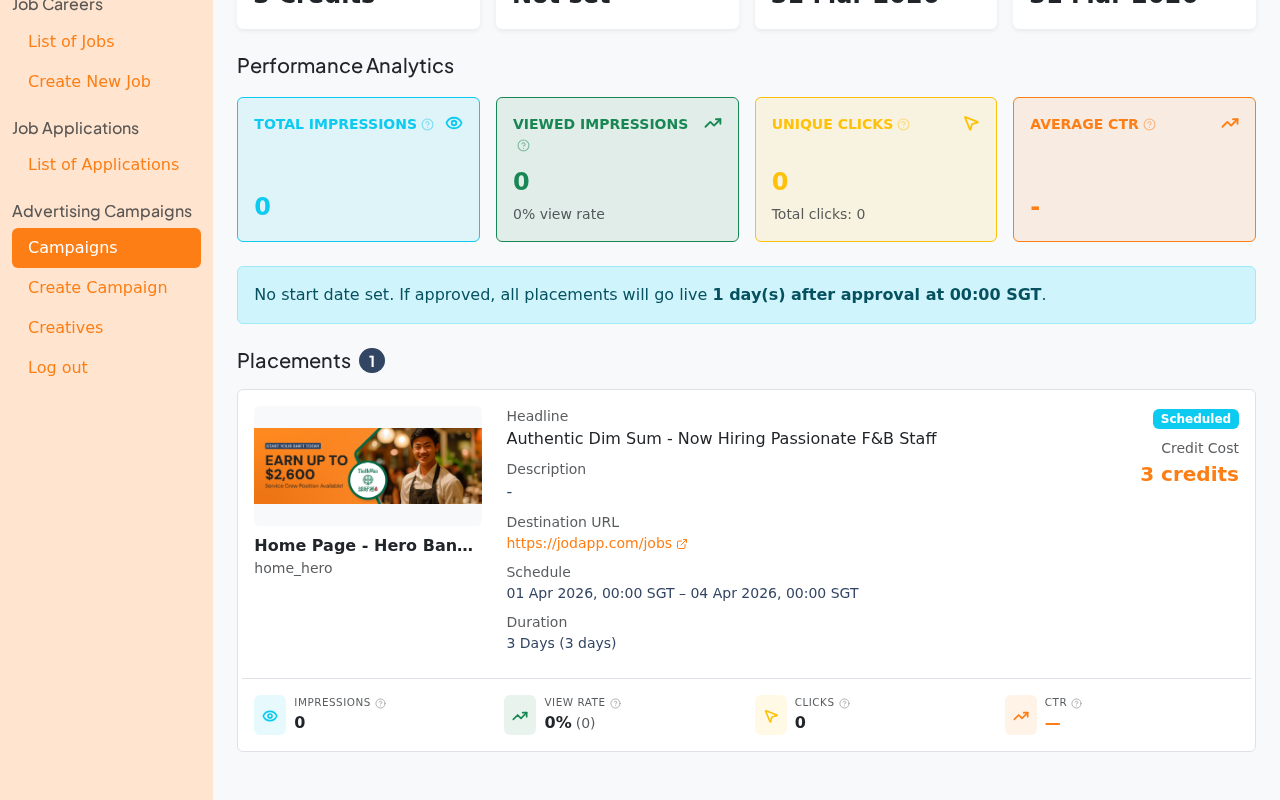
Metrics explained:
| Metric | Description |
|---|---|
| Impressions | How many times the ad was returned to a page visitor |
| Views | How many times the ad actually entered the visitor's visible screen area |
| View Rate | Views ÷ Impressions × 100 |
| Clicks | How many times users clicked on the ad |
| CTR | Click-through rate: Clicks ÷ Impressions × 100 |
UC13 — Company Reuses a Creative
Creatives are stored in your company's creative library and can be reused across campaigns.
When adding a placement (UC1, Step 4), click "Select Creative". The modal shows all creatives uploaded by your company — select any existing one without re-uploading.
This is useful when running the same branding across multiple campaigns or seasonal promotions.
UC14 — Campaign Placement Completes
This is an automatic process — no manual action needed.
A daily background job checks for active placements where end_time ≤ now. Those placements transition Active → Completed.
When all placements in a campaign are in a terminal state (Completed or Cancelled), the campaign itself transitions to Completed.
The employer always receives the full contracted duration — end_time = start_time + duration_days, regardless of whether admin approved on time or late.
UC15 — Admin Manages Placement Inventory
Admins manage the placement slots themselves — which ad slots exist on the website and their pricing.
Navigate to Team Portal → Ads → Placements to see all available placements.
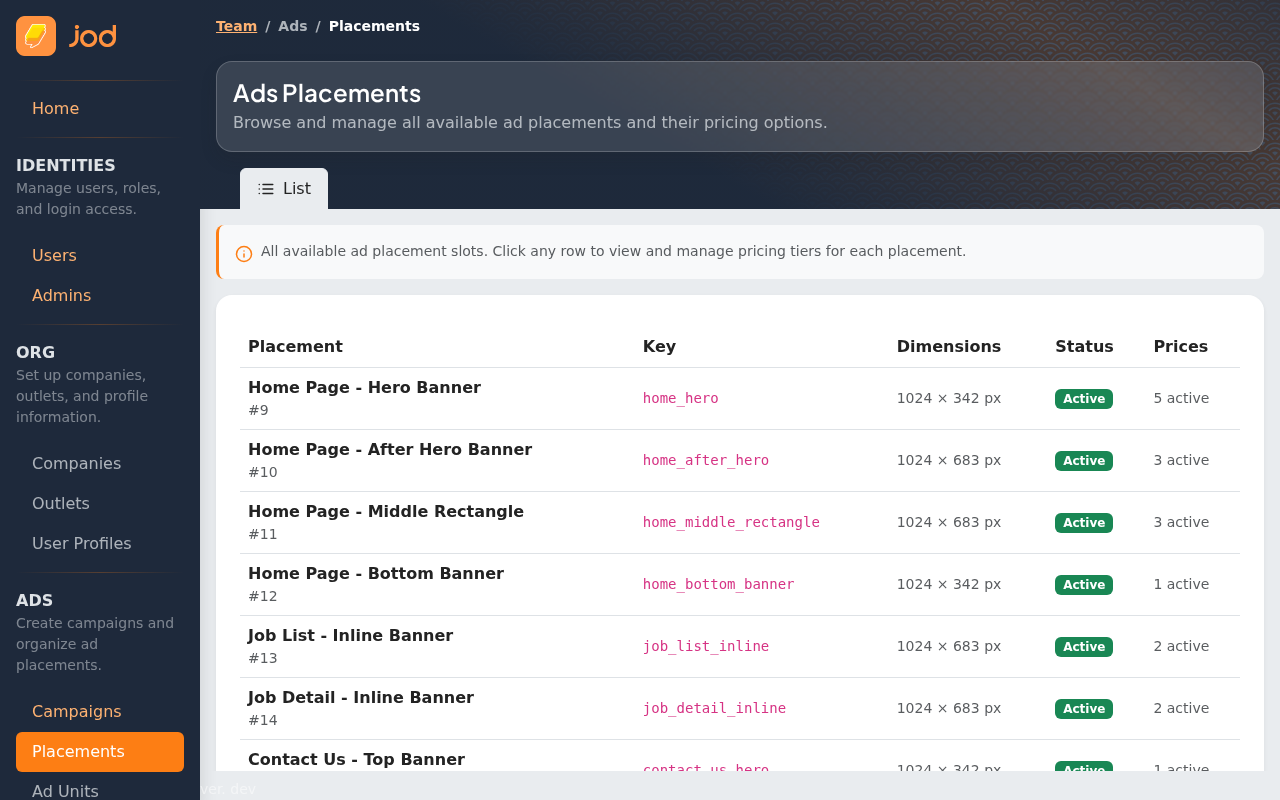
Click on a placement to view its details and pricing options.
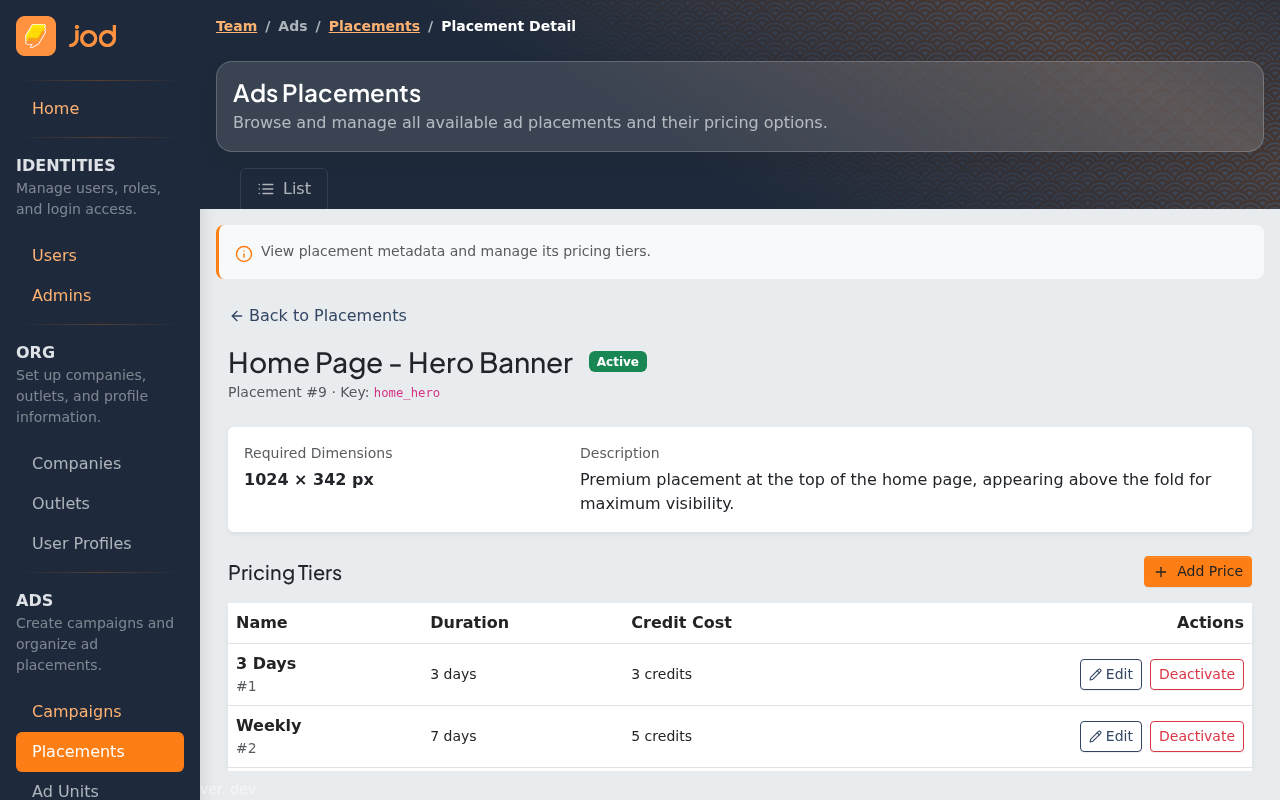
Each placement has:
- A unique key (used by the frontend to identify the slot, e.g.
home_hero) - Required image dimensions
- One or more price tiers (duration + credit cost combinations)